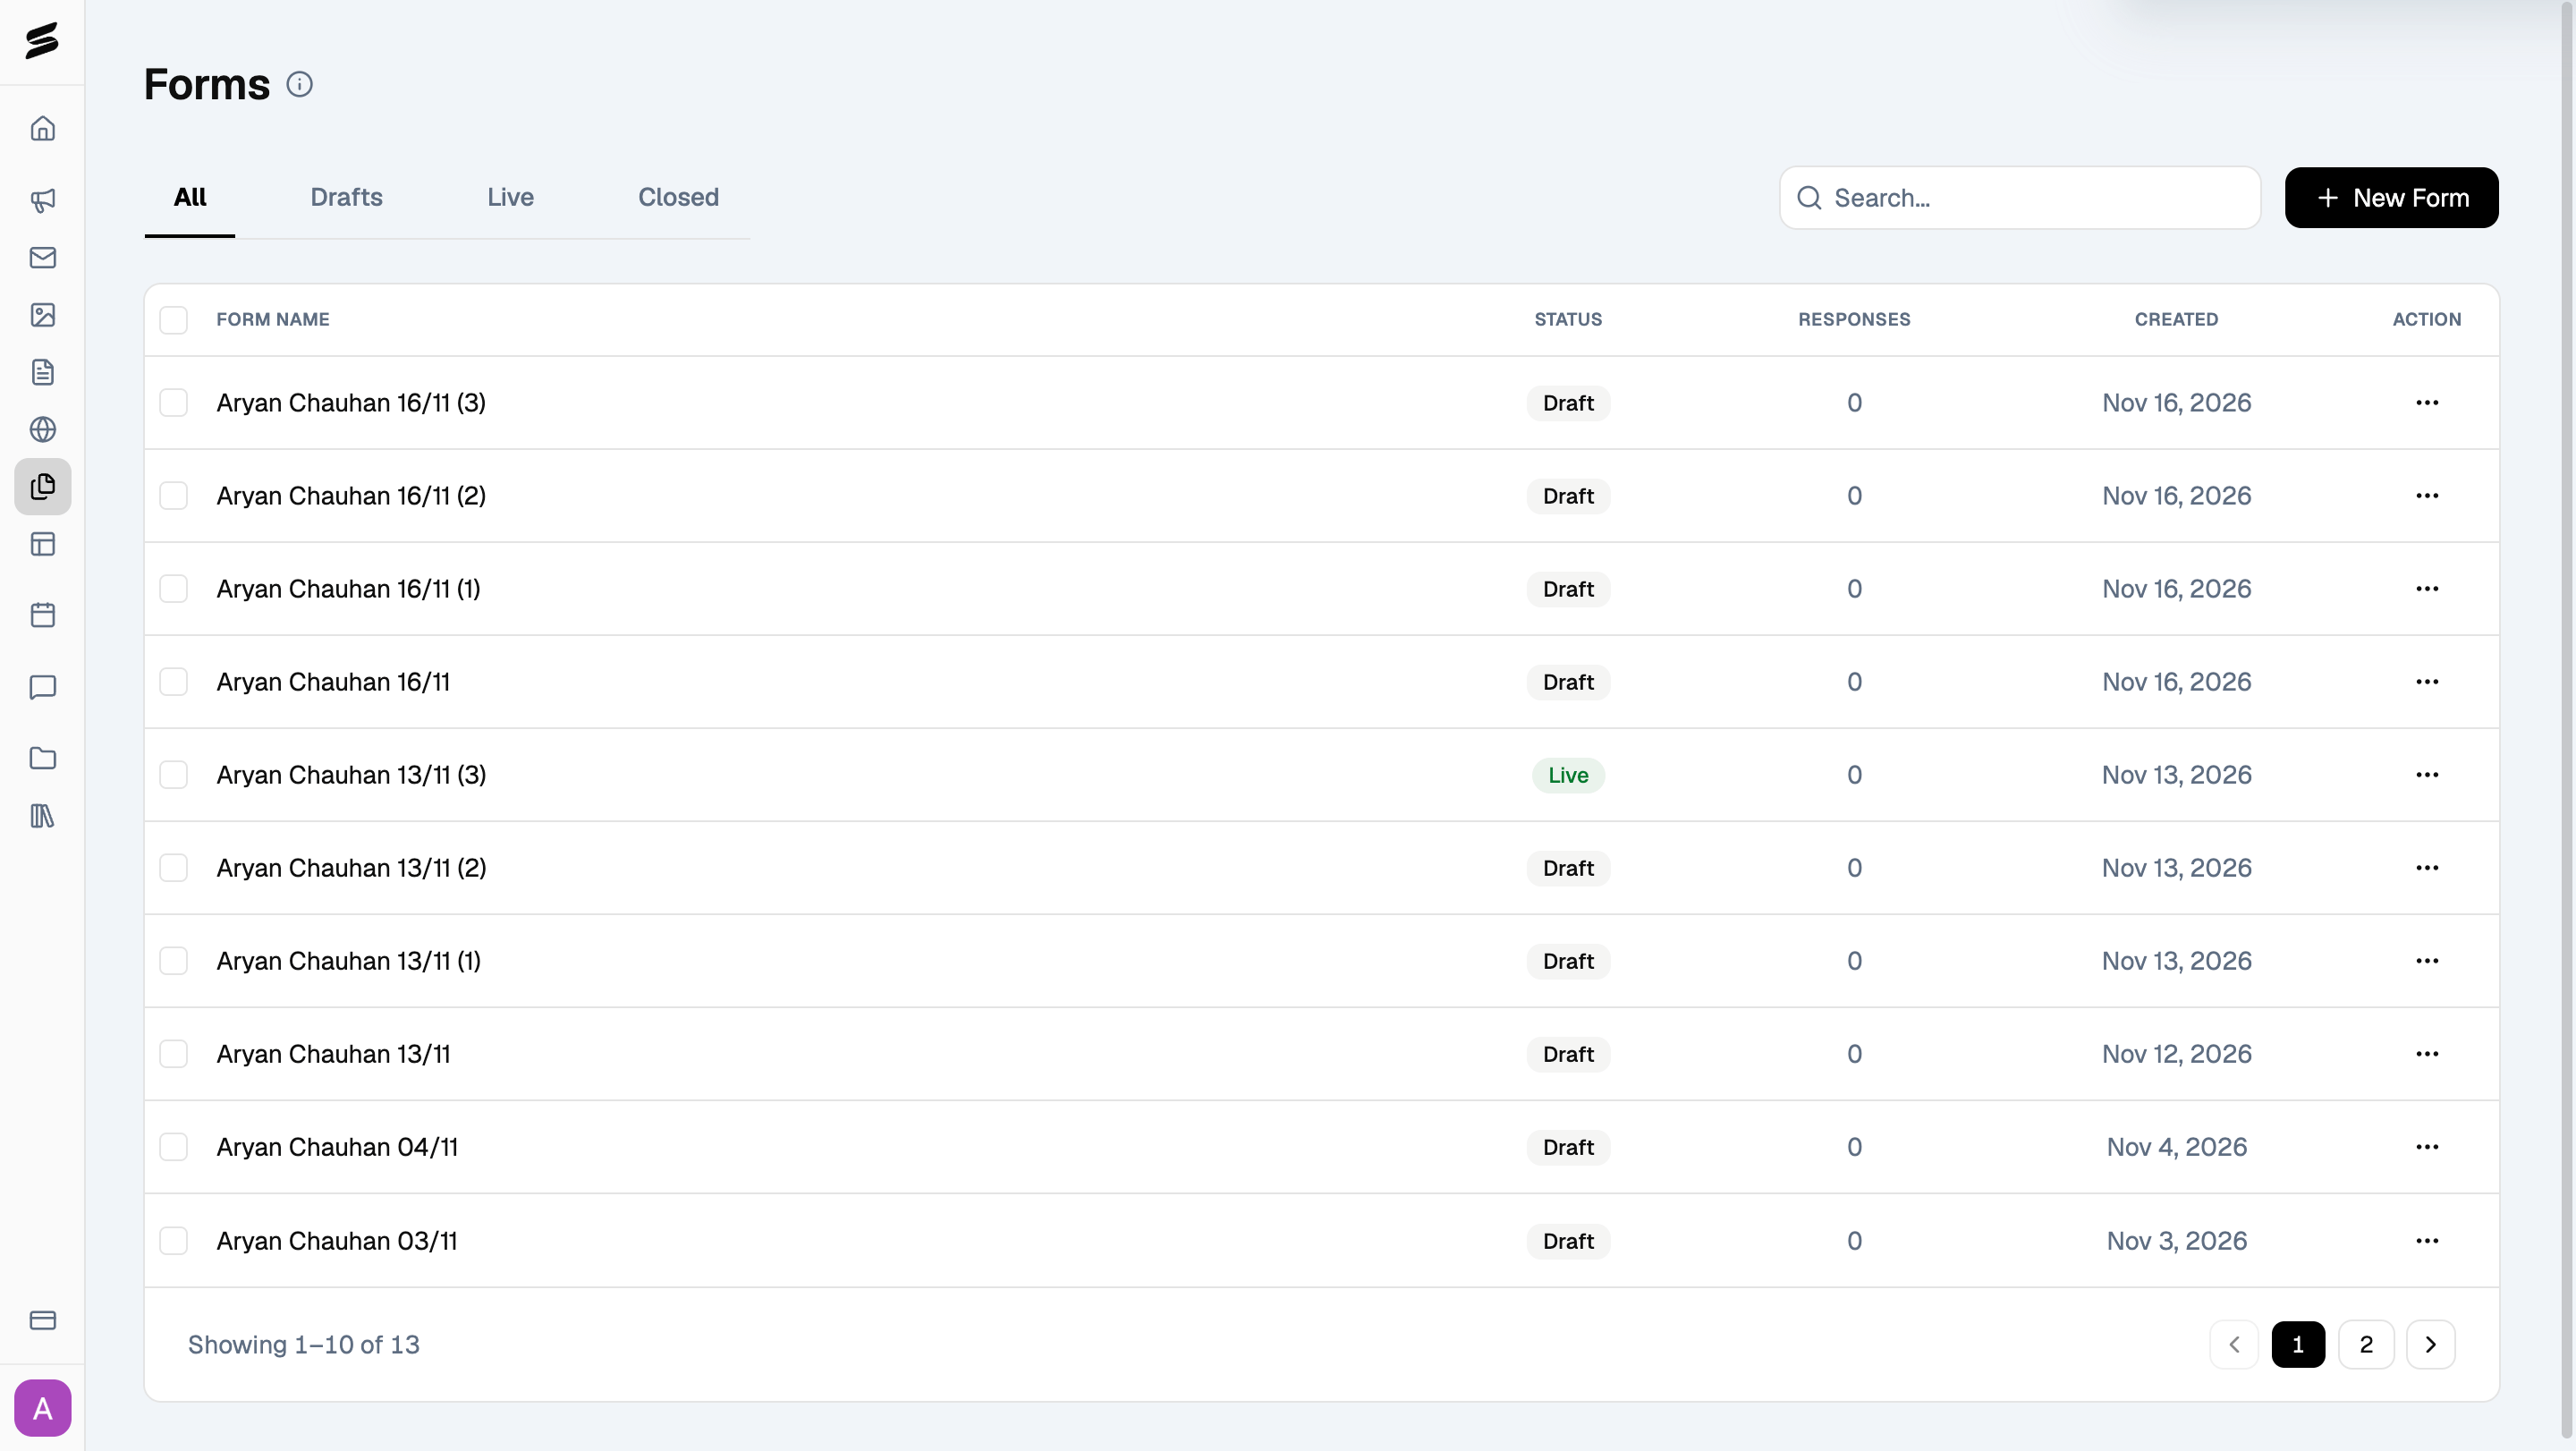
Browse your forms
Go to Forms in the left sidebar to view and manage all your forms. Your forms are organized into four tabs:- All: view every form you’ve created.
- Drafts: view forms that haven’t been published.
- Live: view forms that are currently accepting responses.
- Closed: view forms that are no longer accepting responses.
Start a new form
When you click New Form, the form builder opens with a blank Form details card. Start by adding:- Form title: give your form a name.
- Description: add an optional explanation of what the form is for.
- Banner image: add an optional image to personalize the form.
Add fields to your form
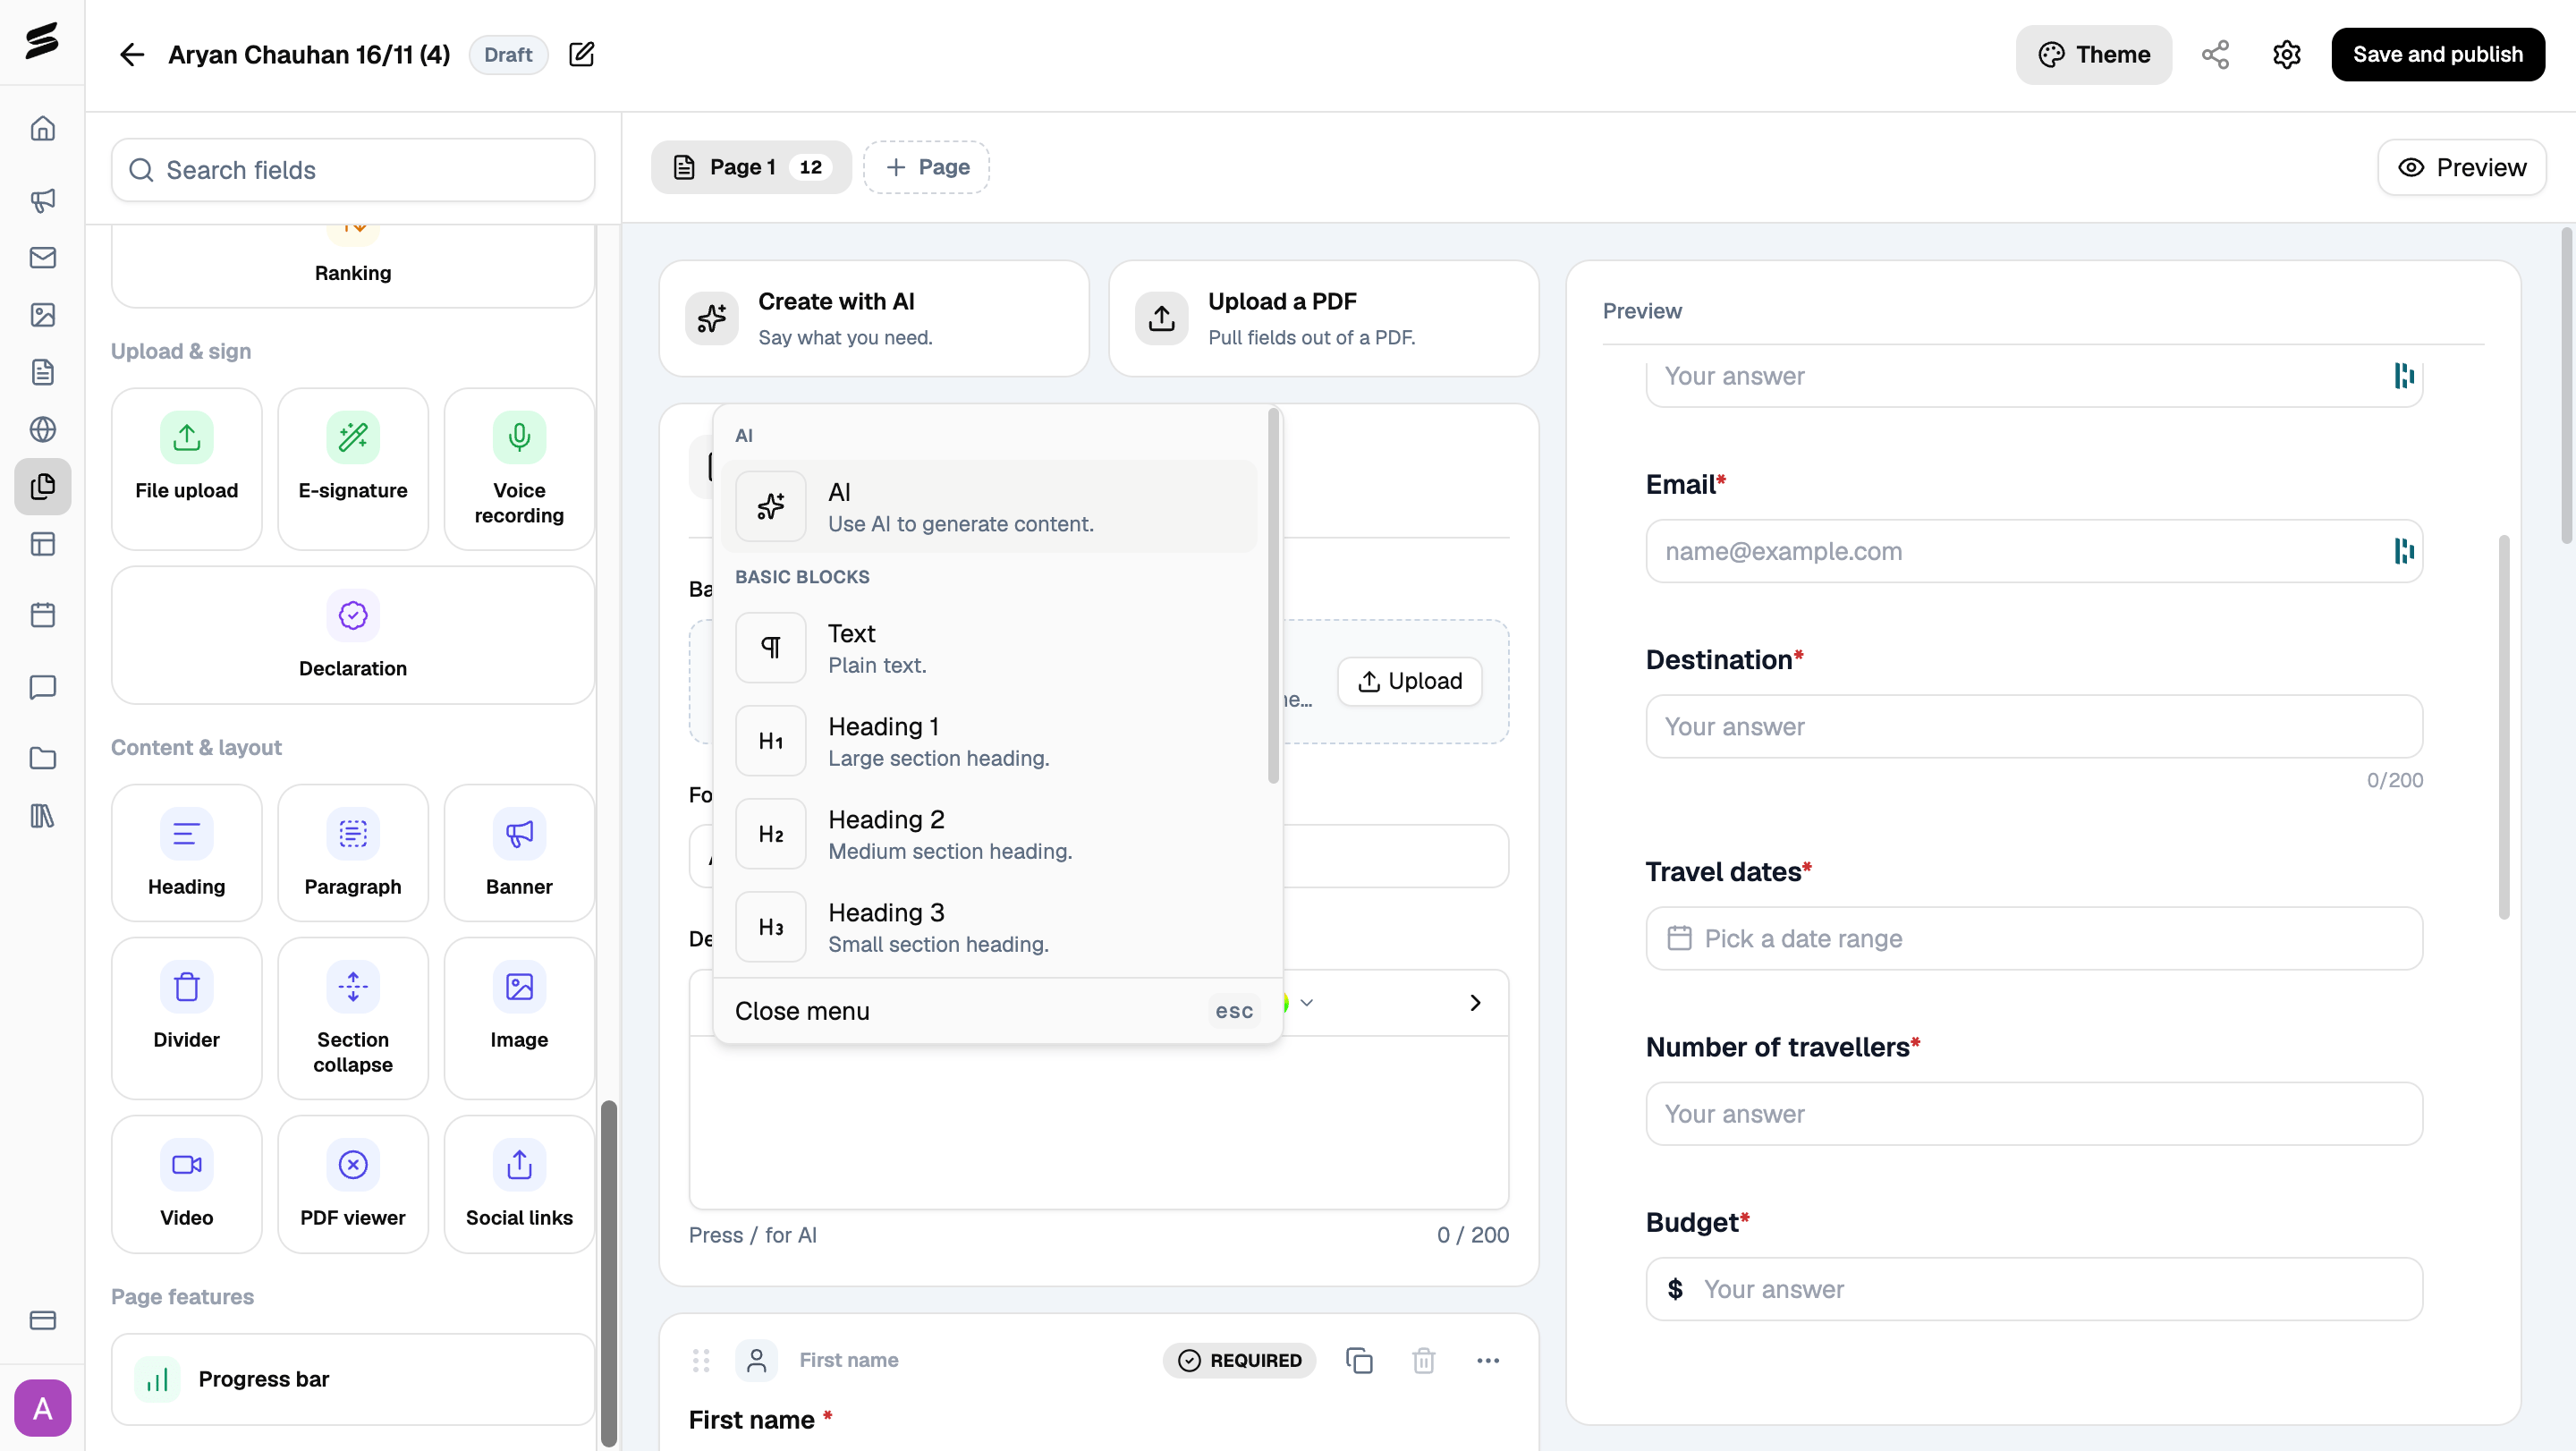
The field library on the left contains different field types you can add to collect information from clients. Common fields: Short answer, Email, Phone number, Dropdown, Multiple choice, Date picker, Checkboxes, File upload, E-signature. You can also add ready-made personal information fields, such as First name, Last name, and Email address, without configuring them manually. As you build your form, the panel on the right displays a live Preview of what your clients will see. At the top of the field library, you’ll also find two ways to create fields faster: Create with AI and Upload a PDF.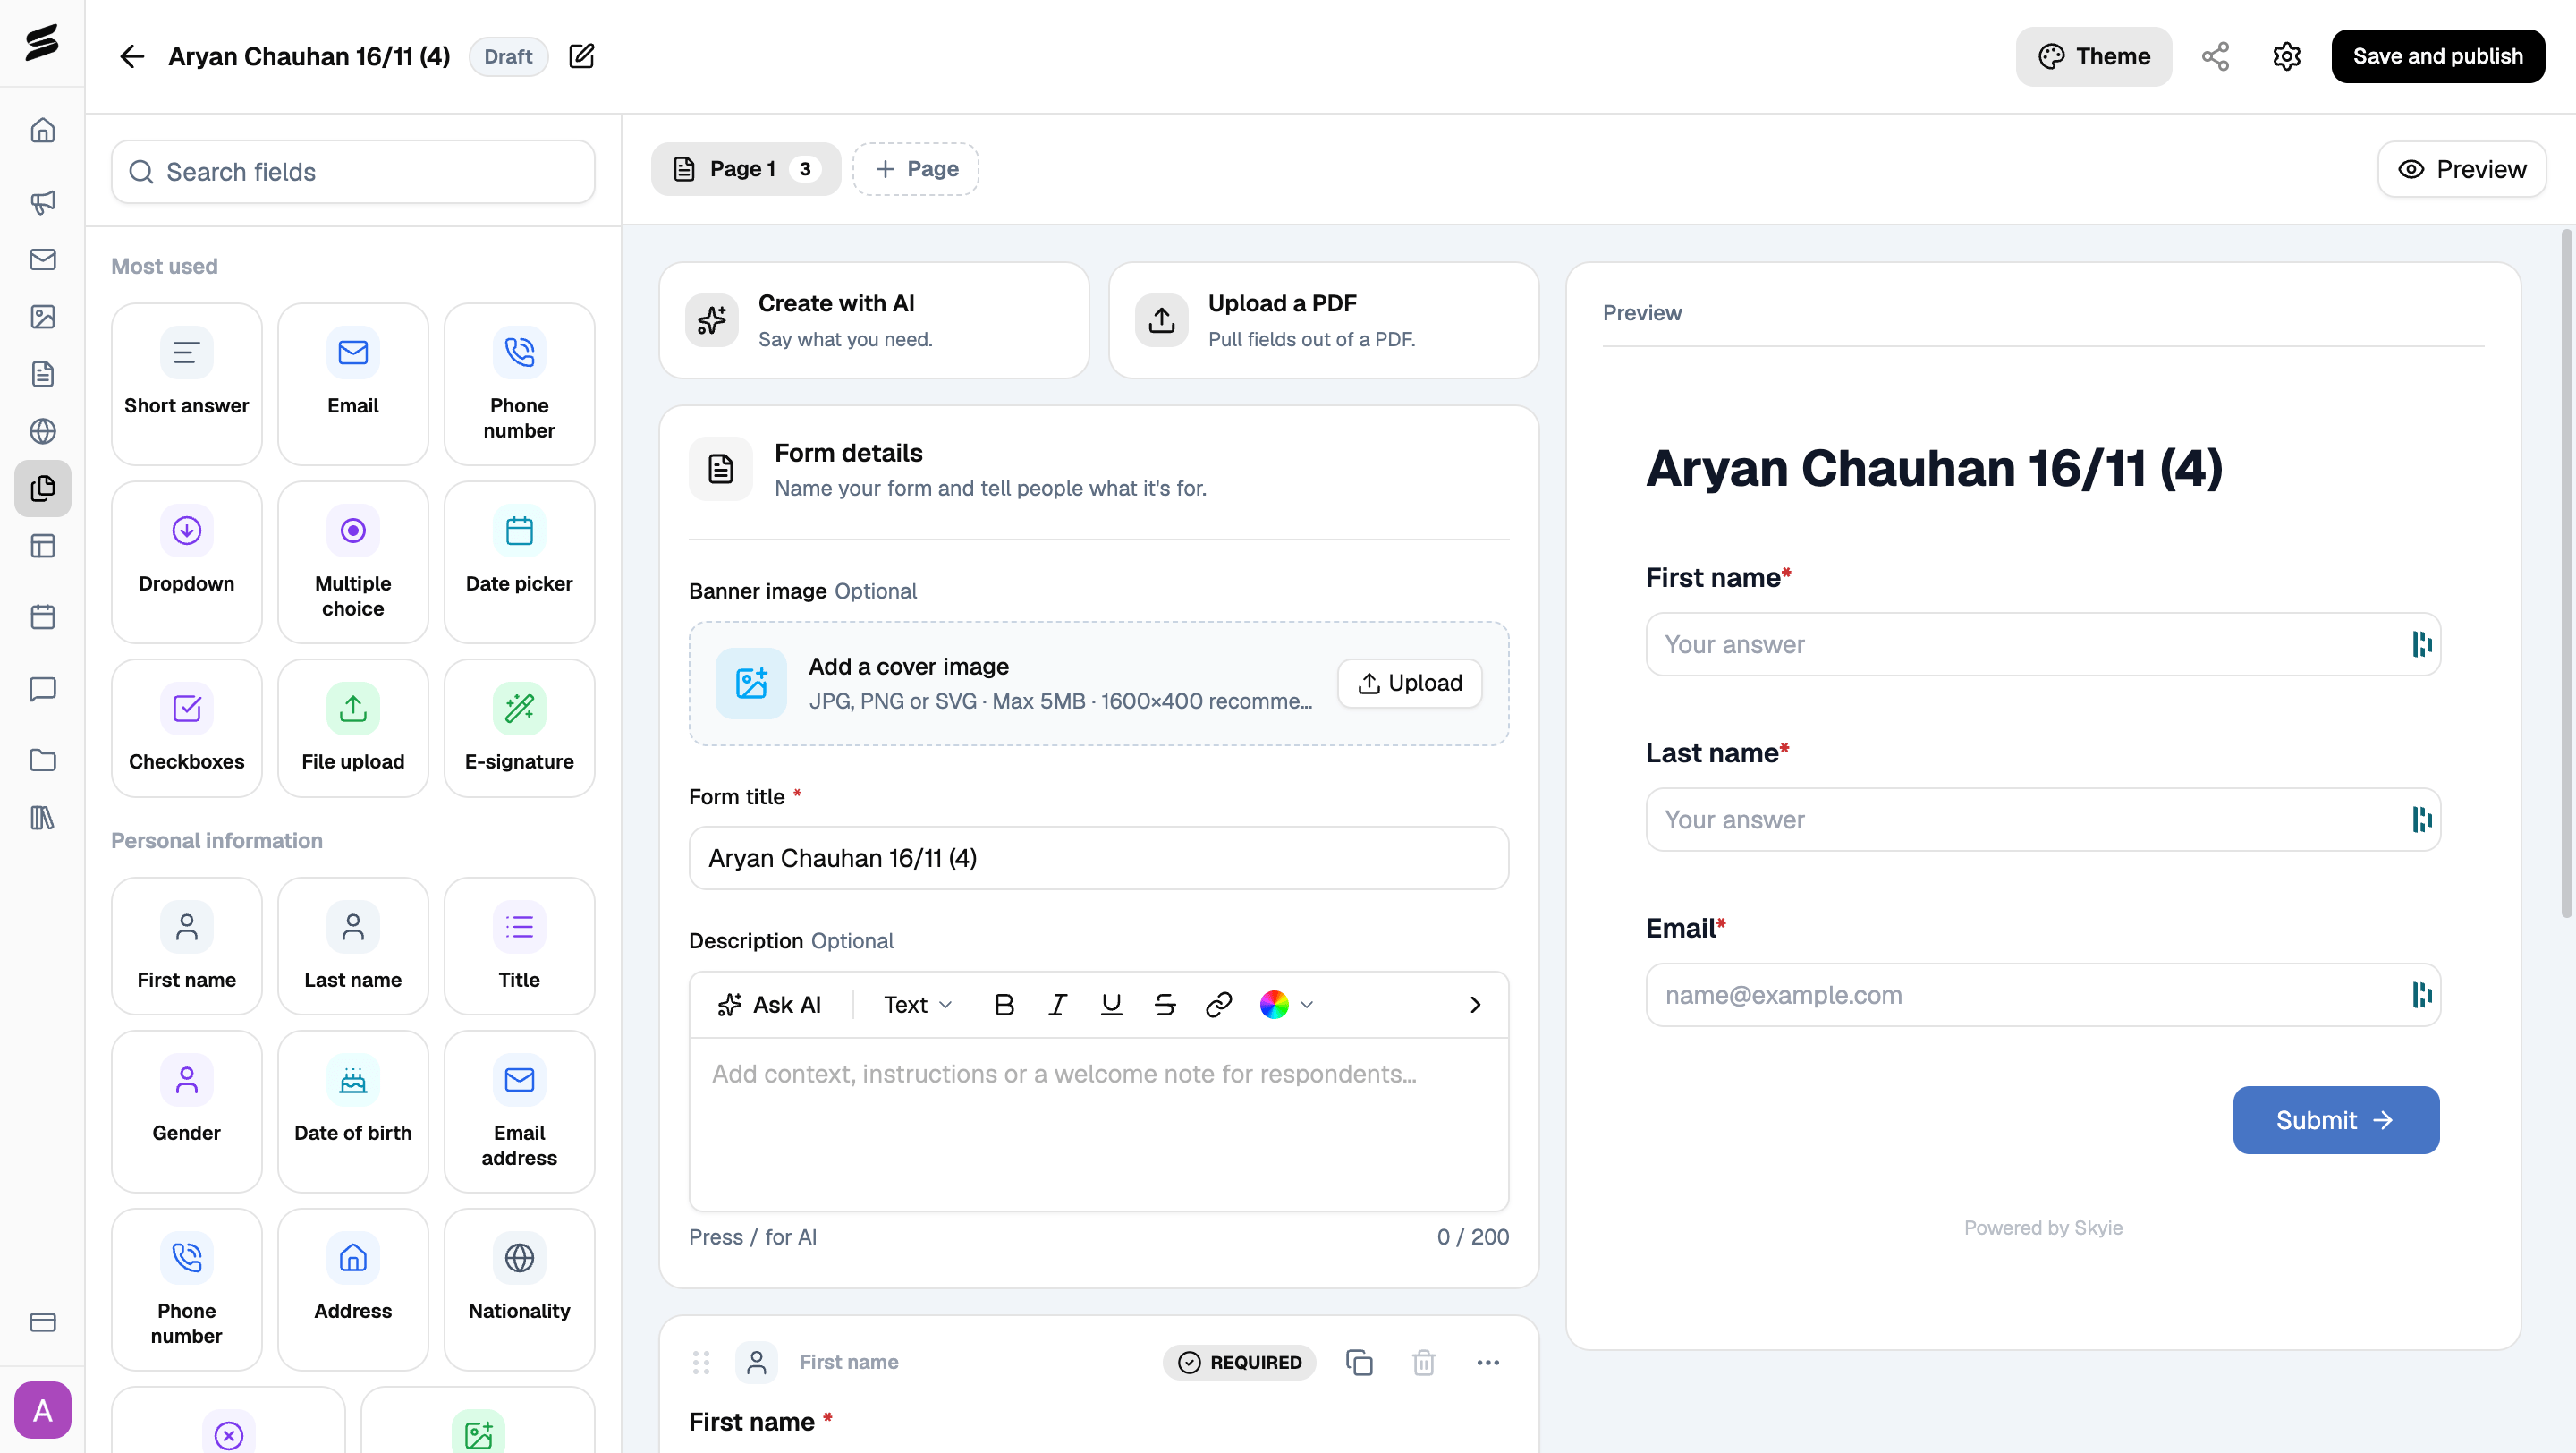
Create forms faster with AI or a PDF
Create with AI
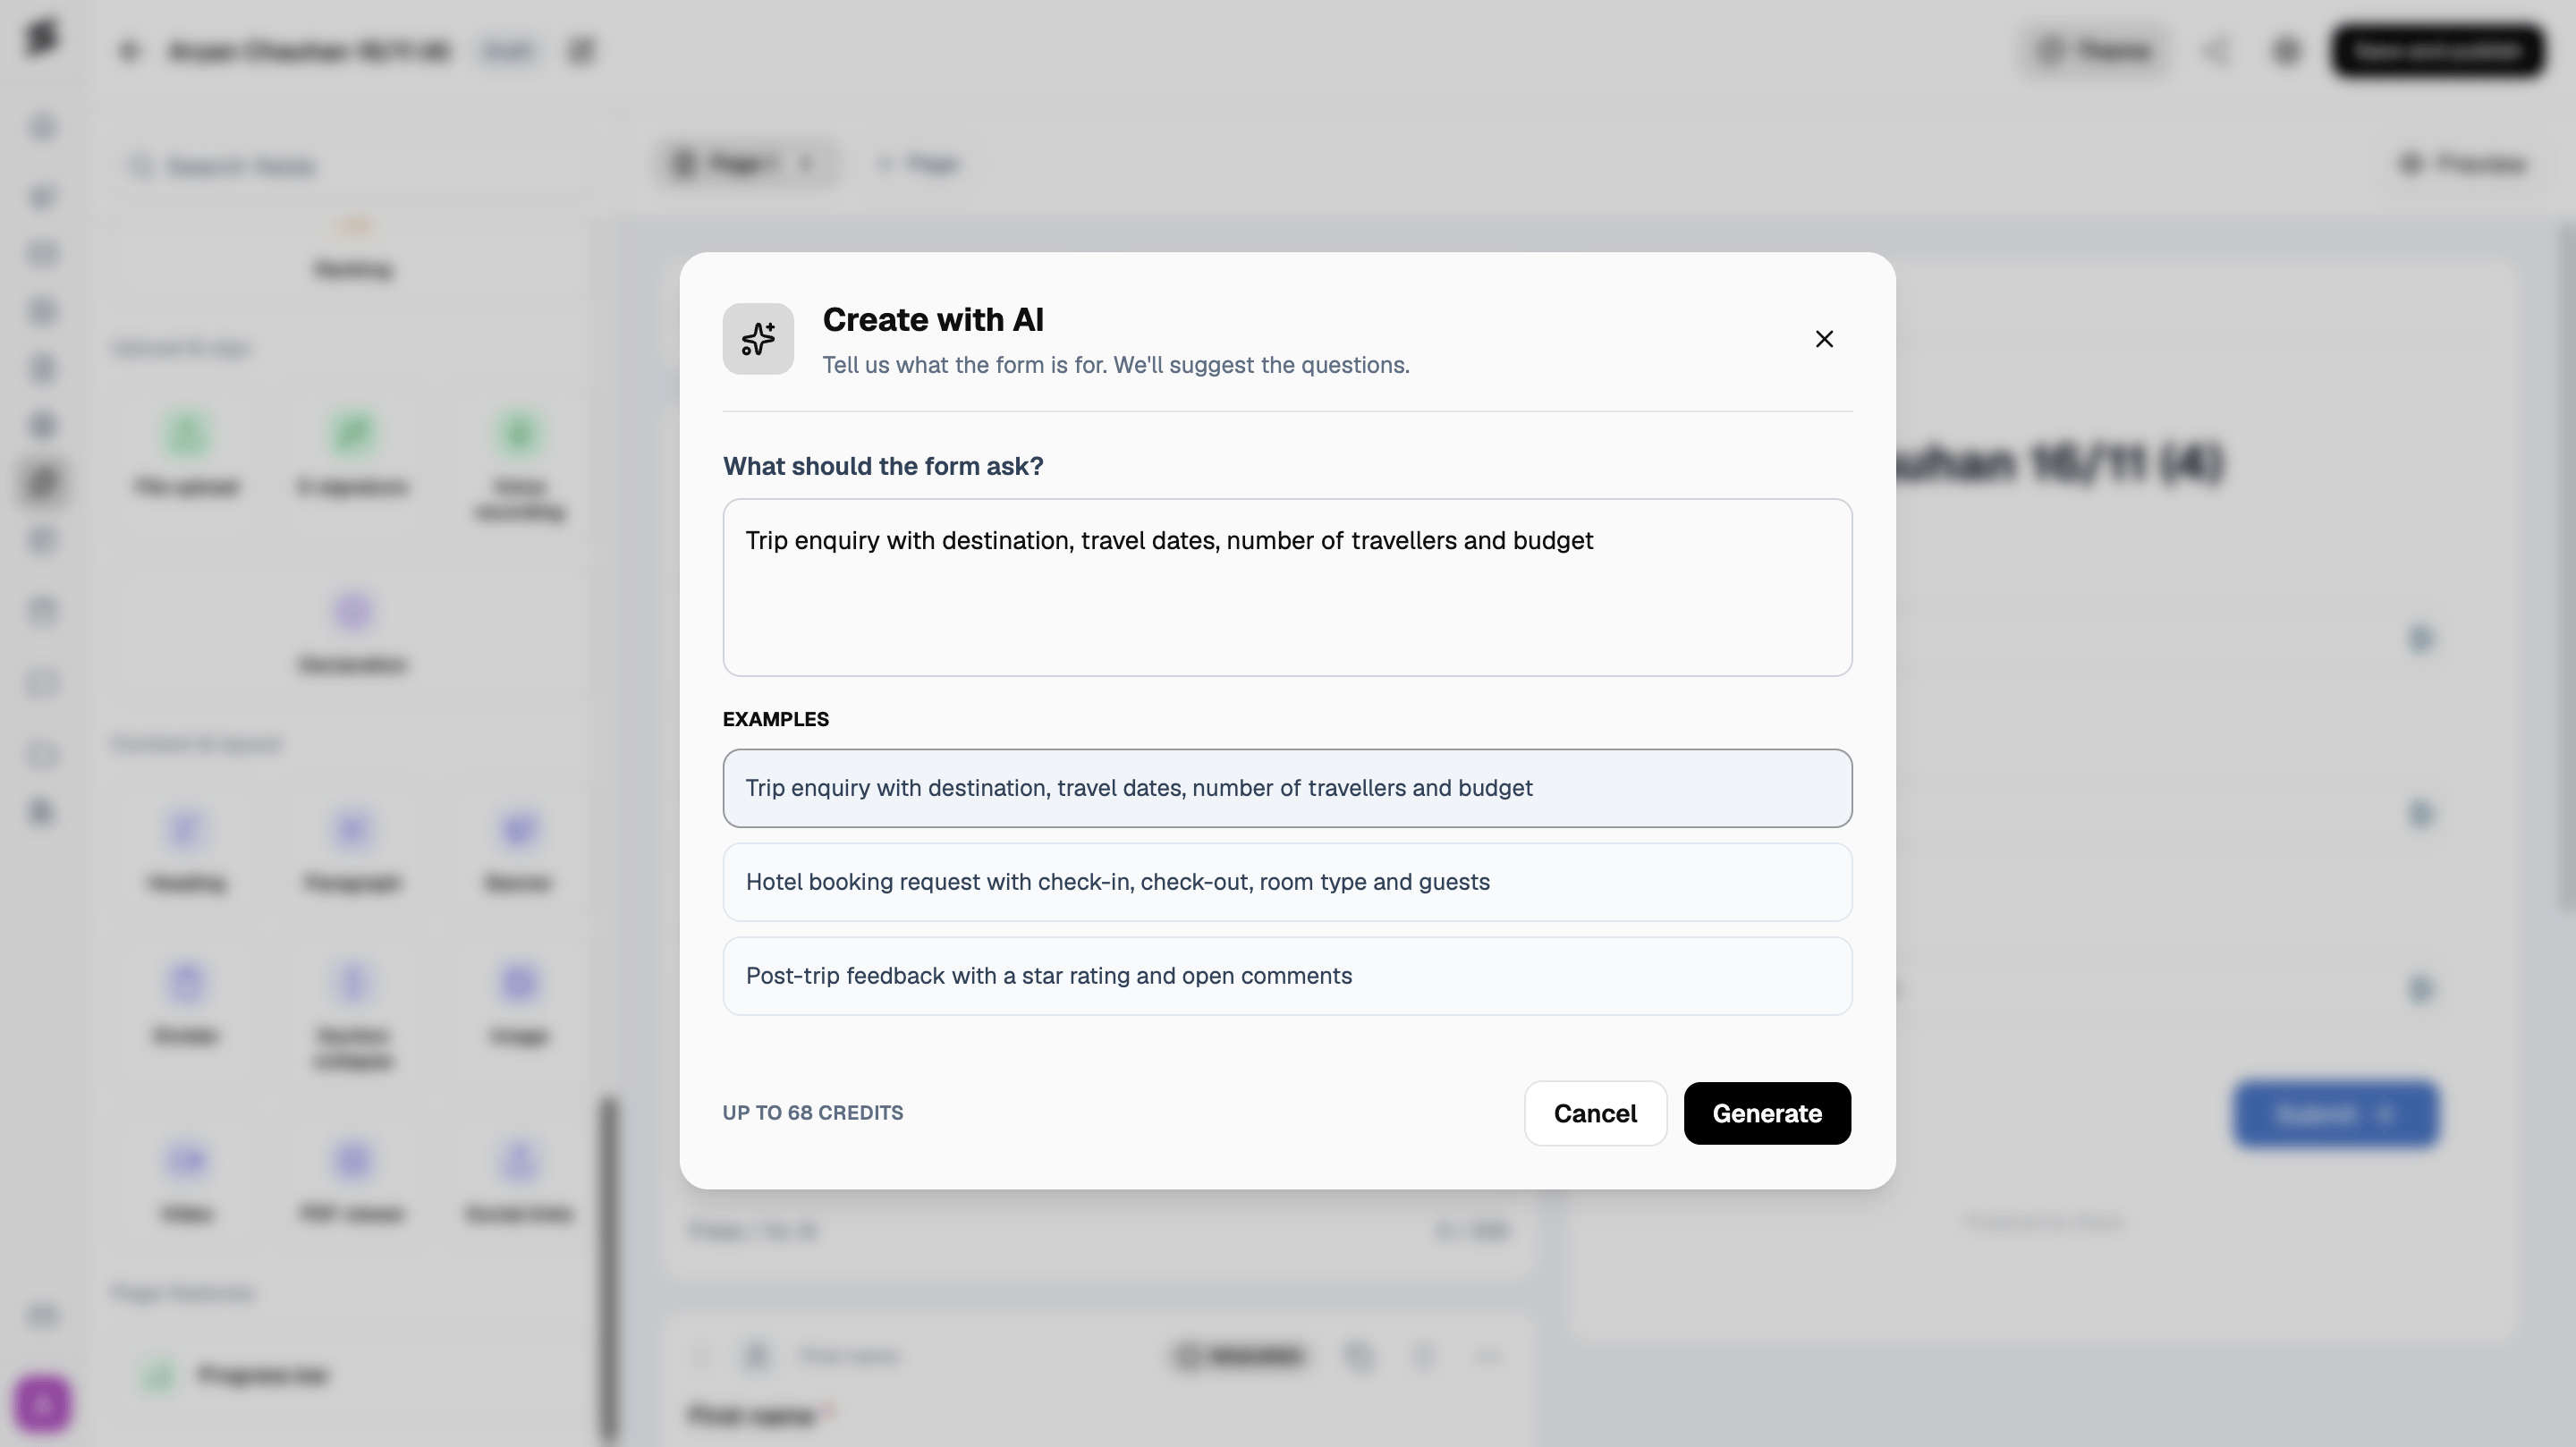
Don’t want to add every field manually? Let Skyie build your form using AI.- Click Create with AI.
- Describe the information you want to collect, for example “Create a trip enquiry form that asks for the destination, travel dates, number of travellers, and budget.”
Review your suggested fields
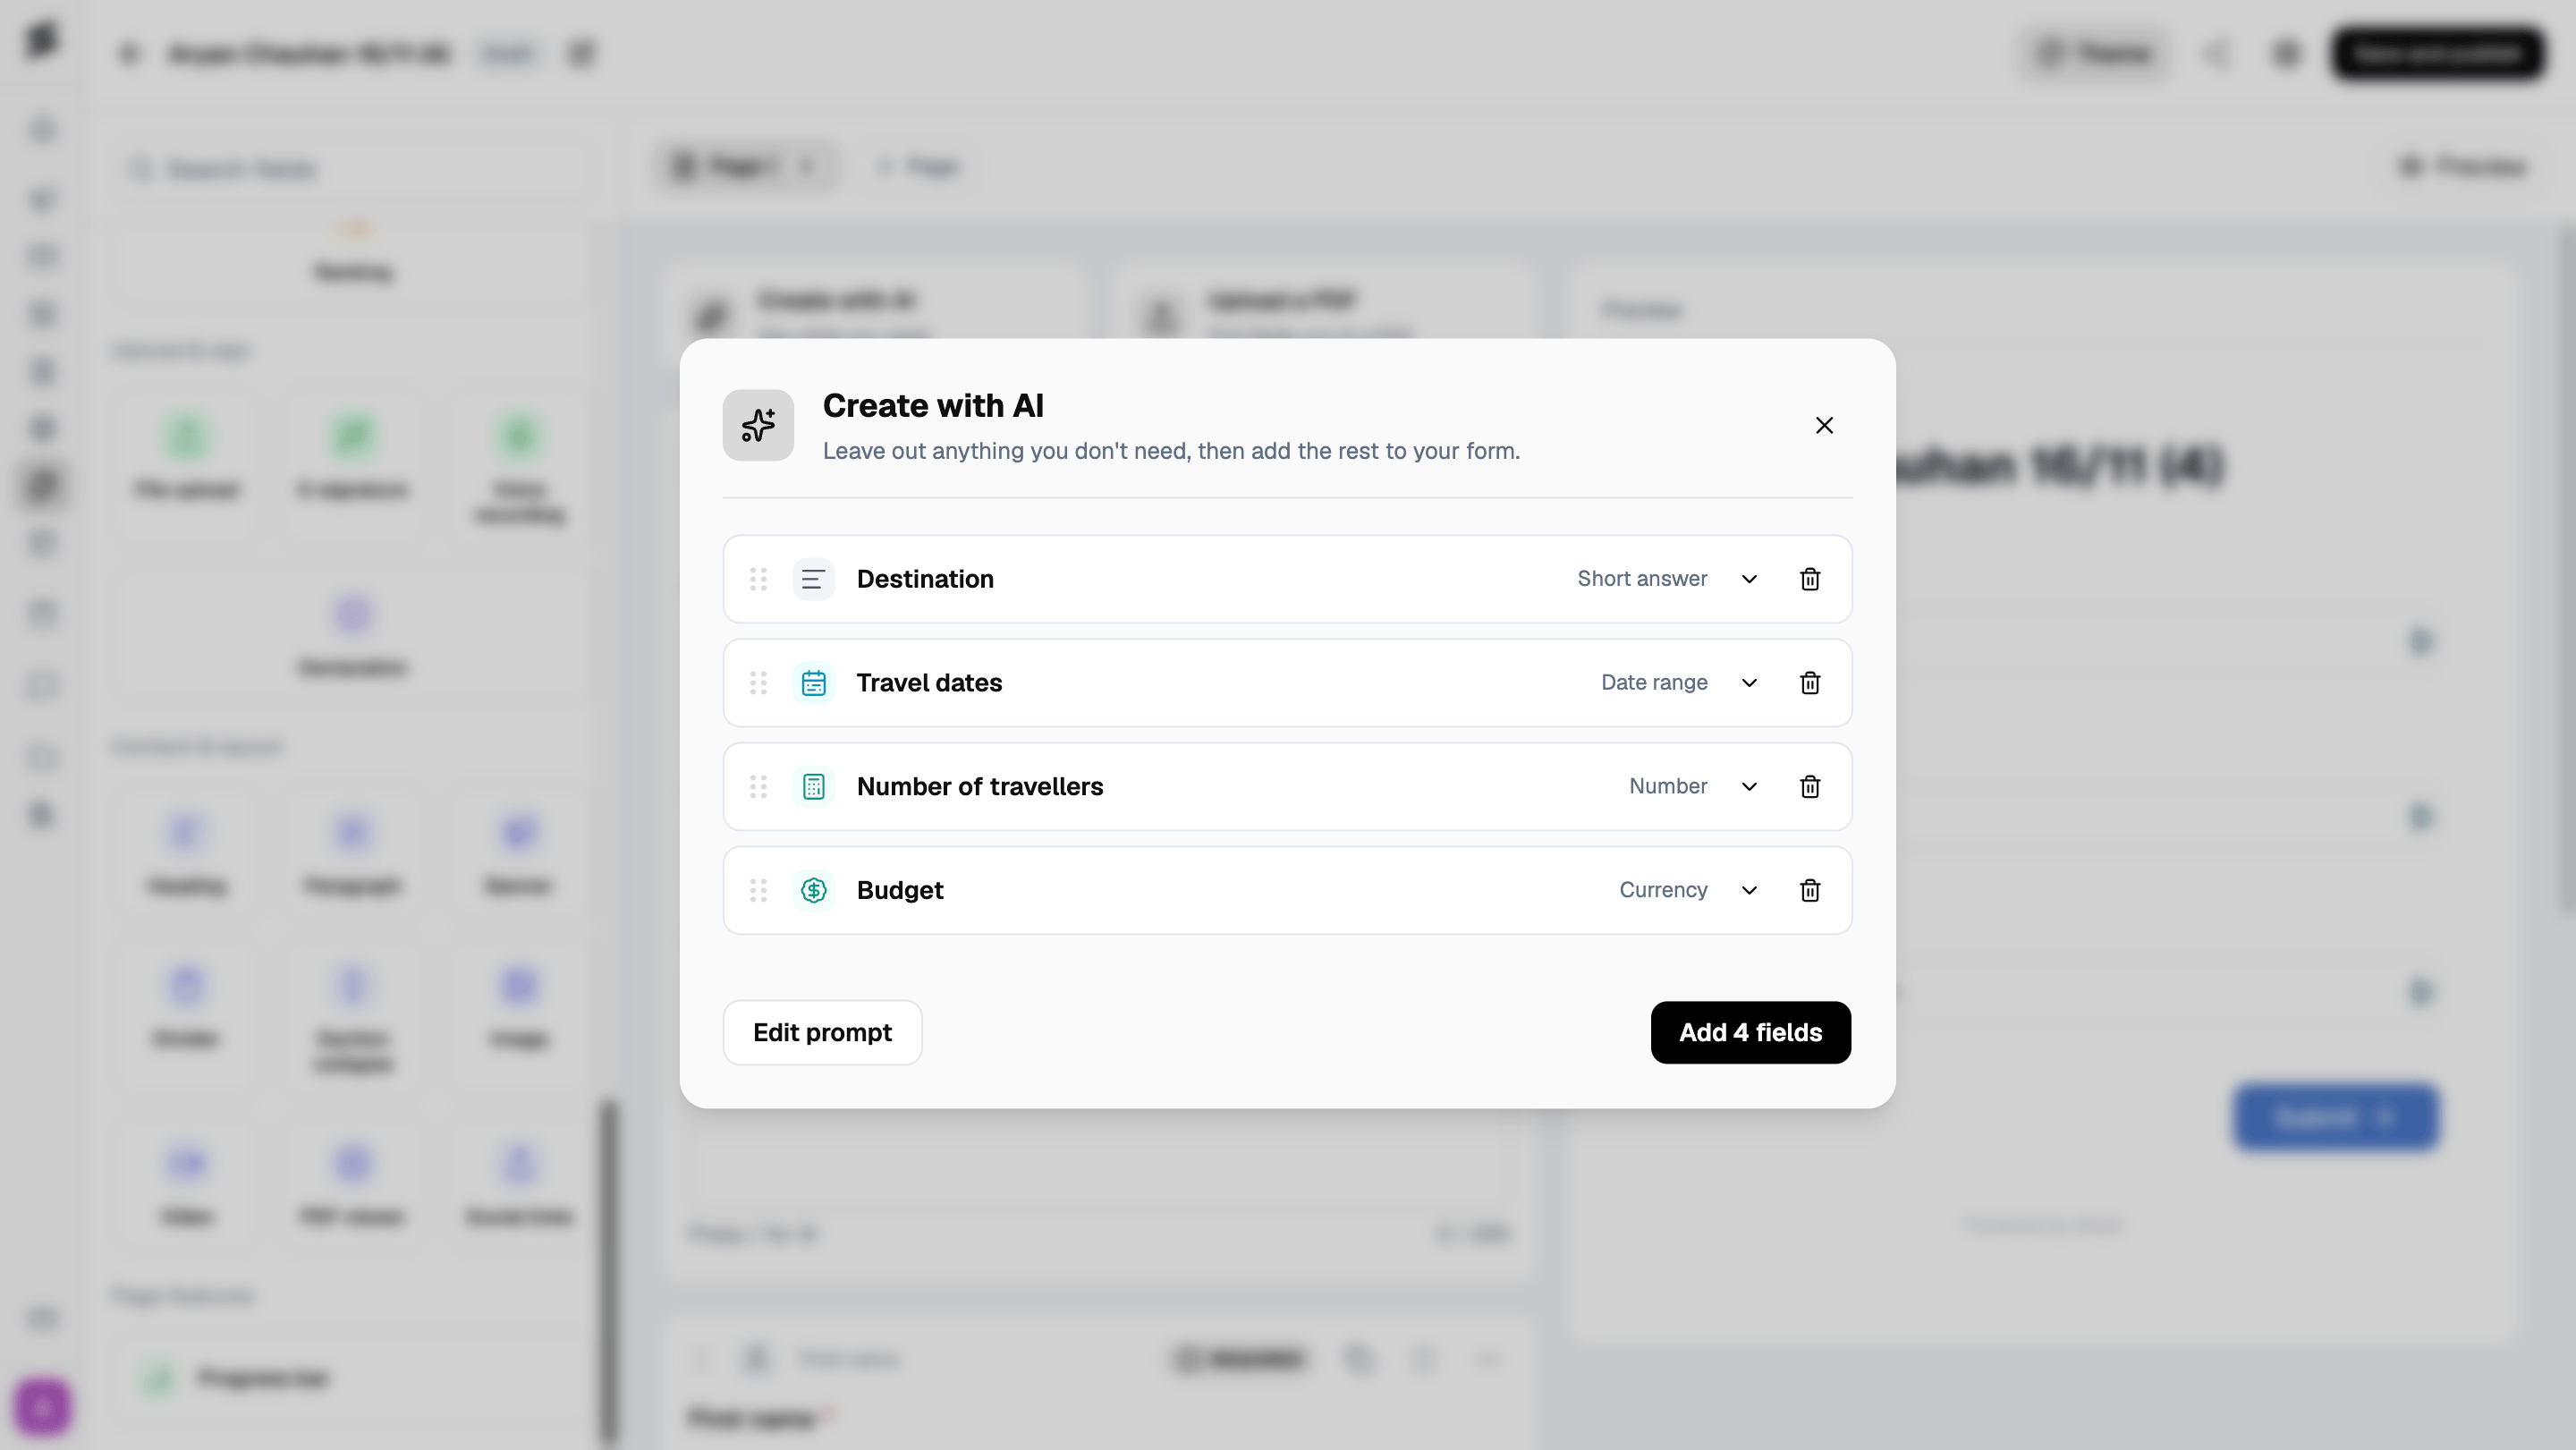
Once you click Generate, Skyie suggests fields based on your description and matches each one to a suitable field type, for example Destination as Short answer, Travel dates as Date range, Number of travellers as Number, and Budget as Currency. Before adding them to your form, you can:- Remove any fields you don’t need.
- Click Edit prompt to change your instructions and generate a new set of fields.
- Click Add N fields to add all the suggested fields to your form.
Upload a PDF
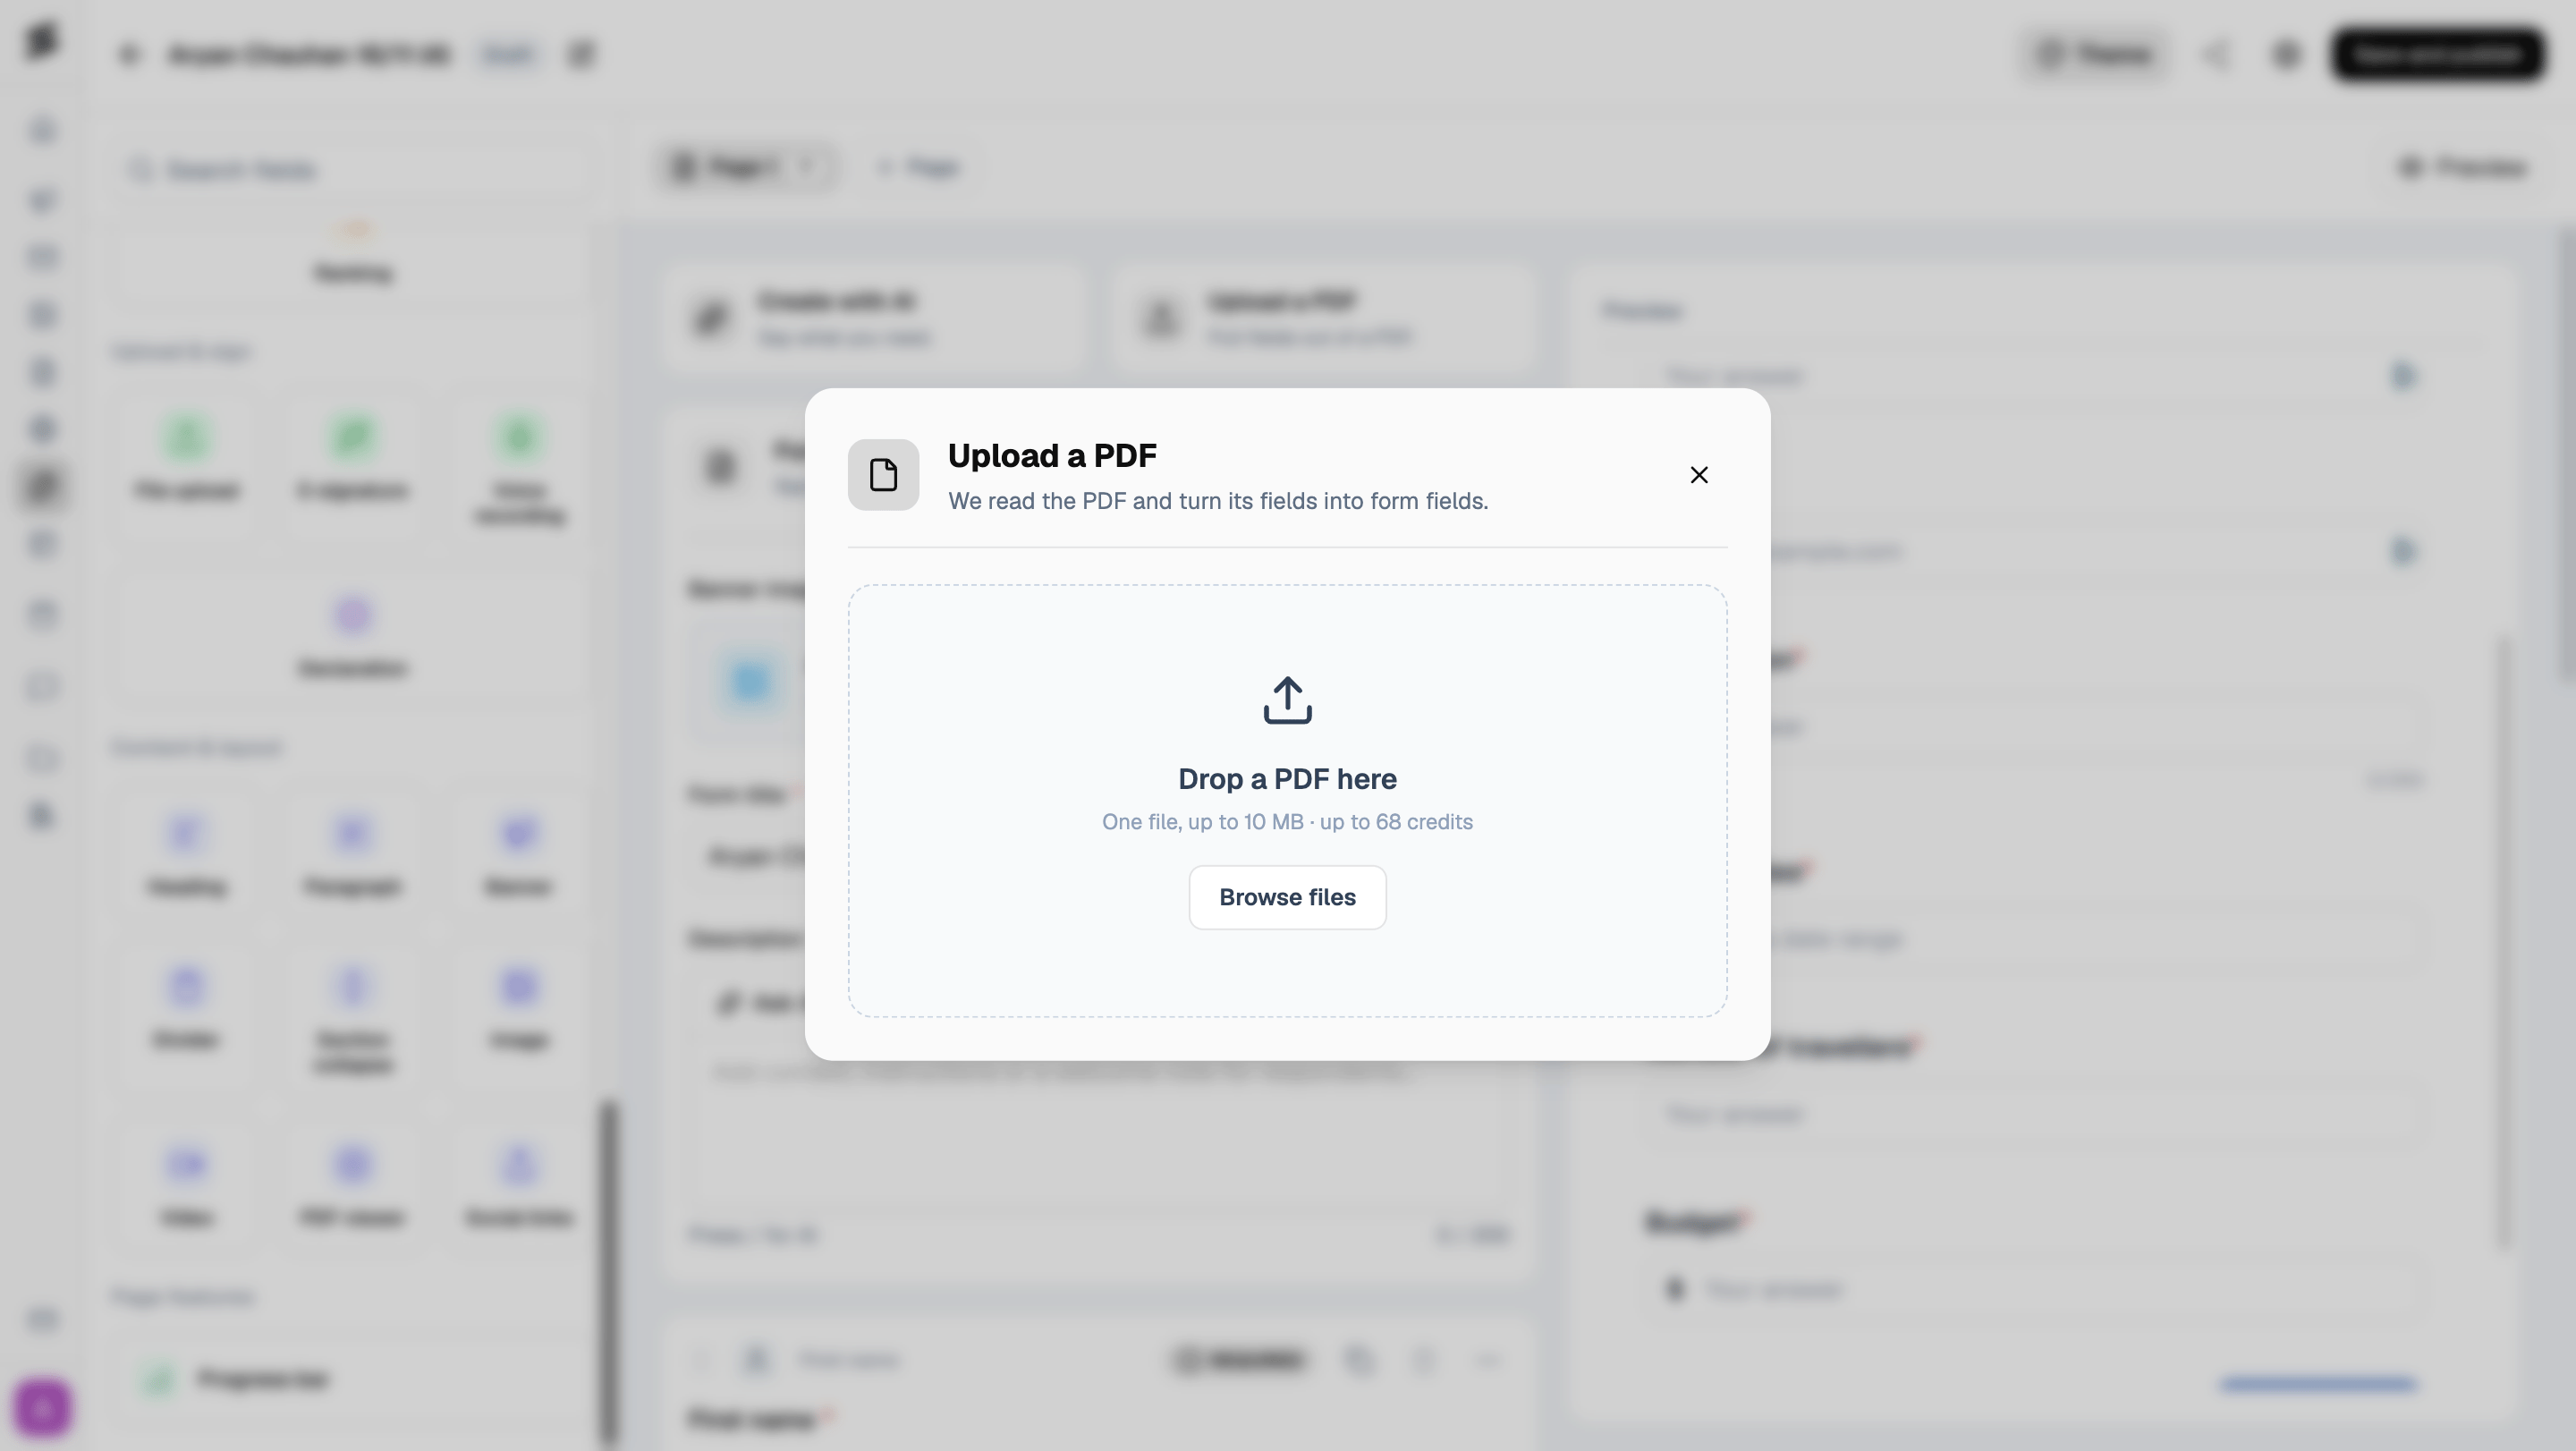
Already have a paper form or an existing PDF? Upload it to let Skyie identify the fields for you.- Click Upload a PDF.
- Select or drag and drop your PDF. You can upload one file at a time, up to 10 MB.
Review the detected fields
Skyie scans your PDF and identifies the fields it can turn into form fields. Name and email fields are automatically skipped because every form already includes them. Review the suggested fields, remove anything you don’t need, then click Add N fields to add them to your form.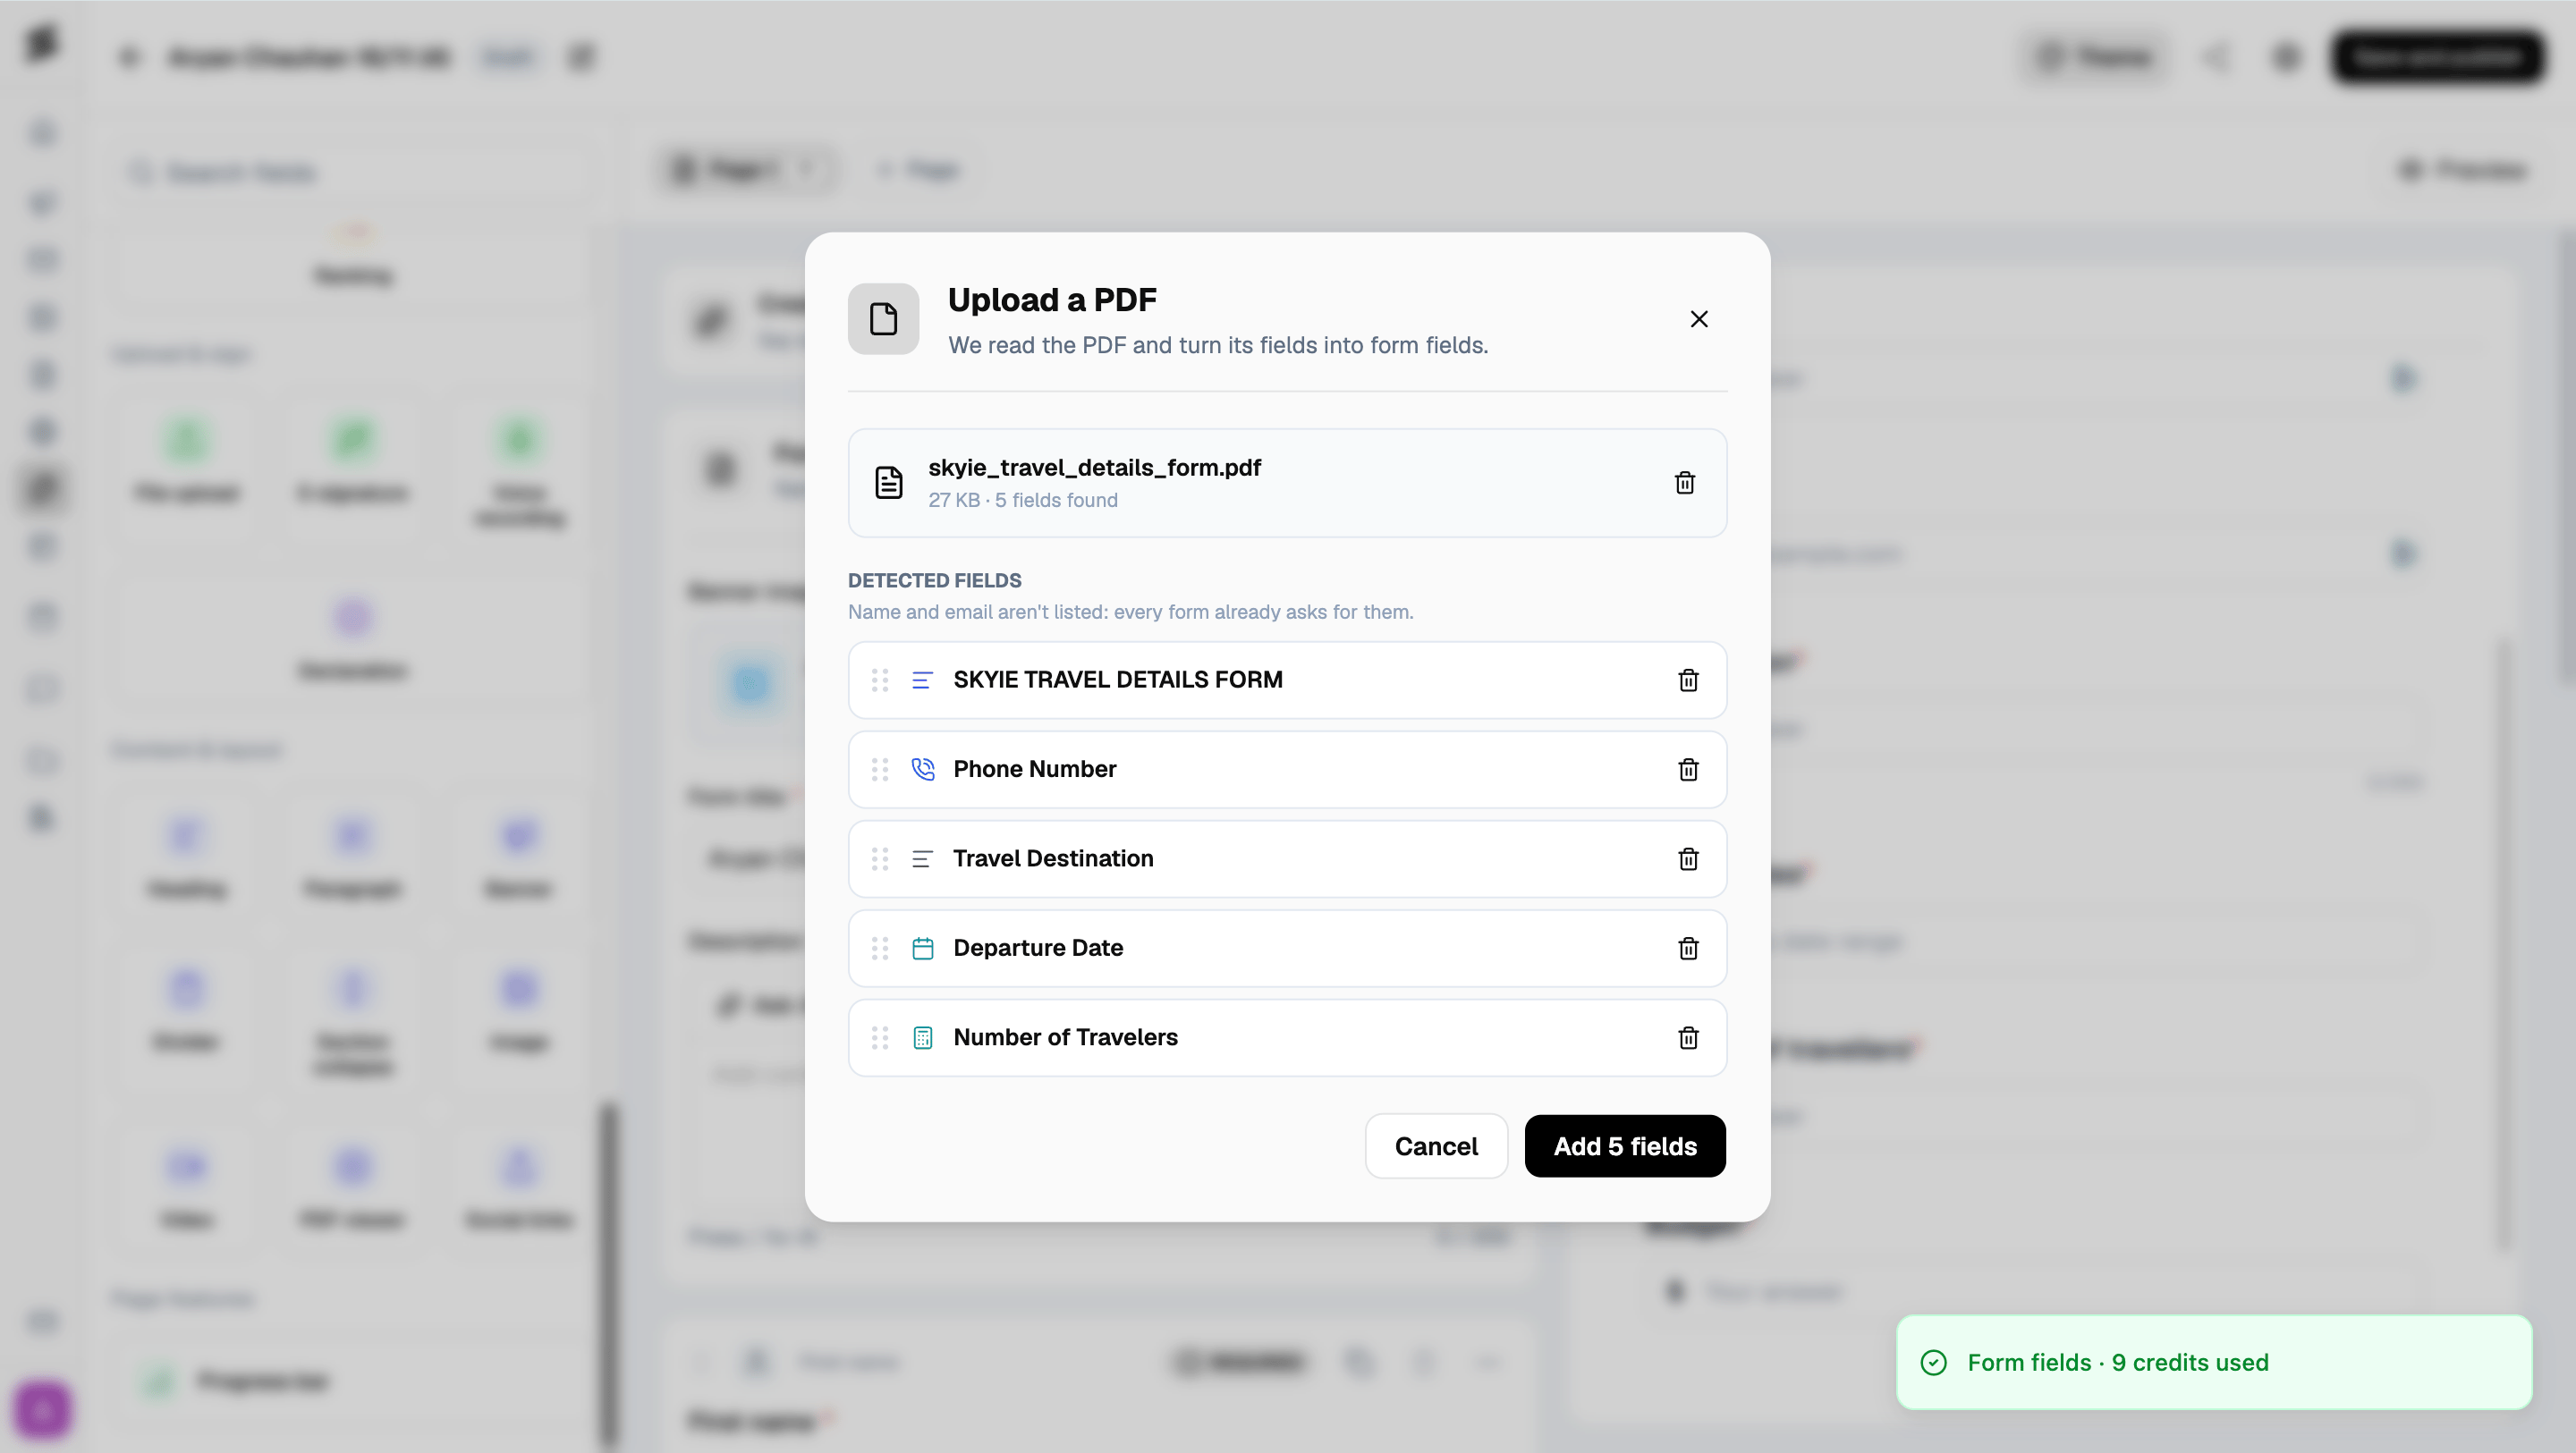
Customize your fields
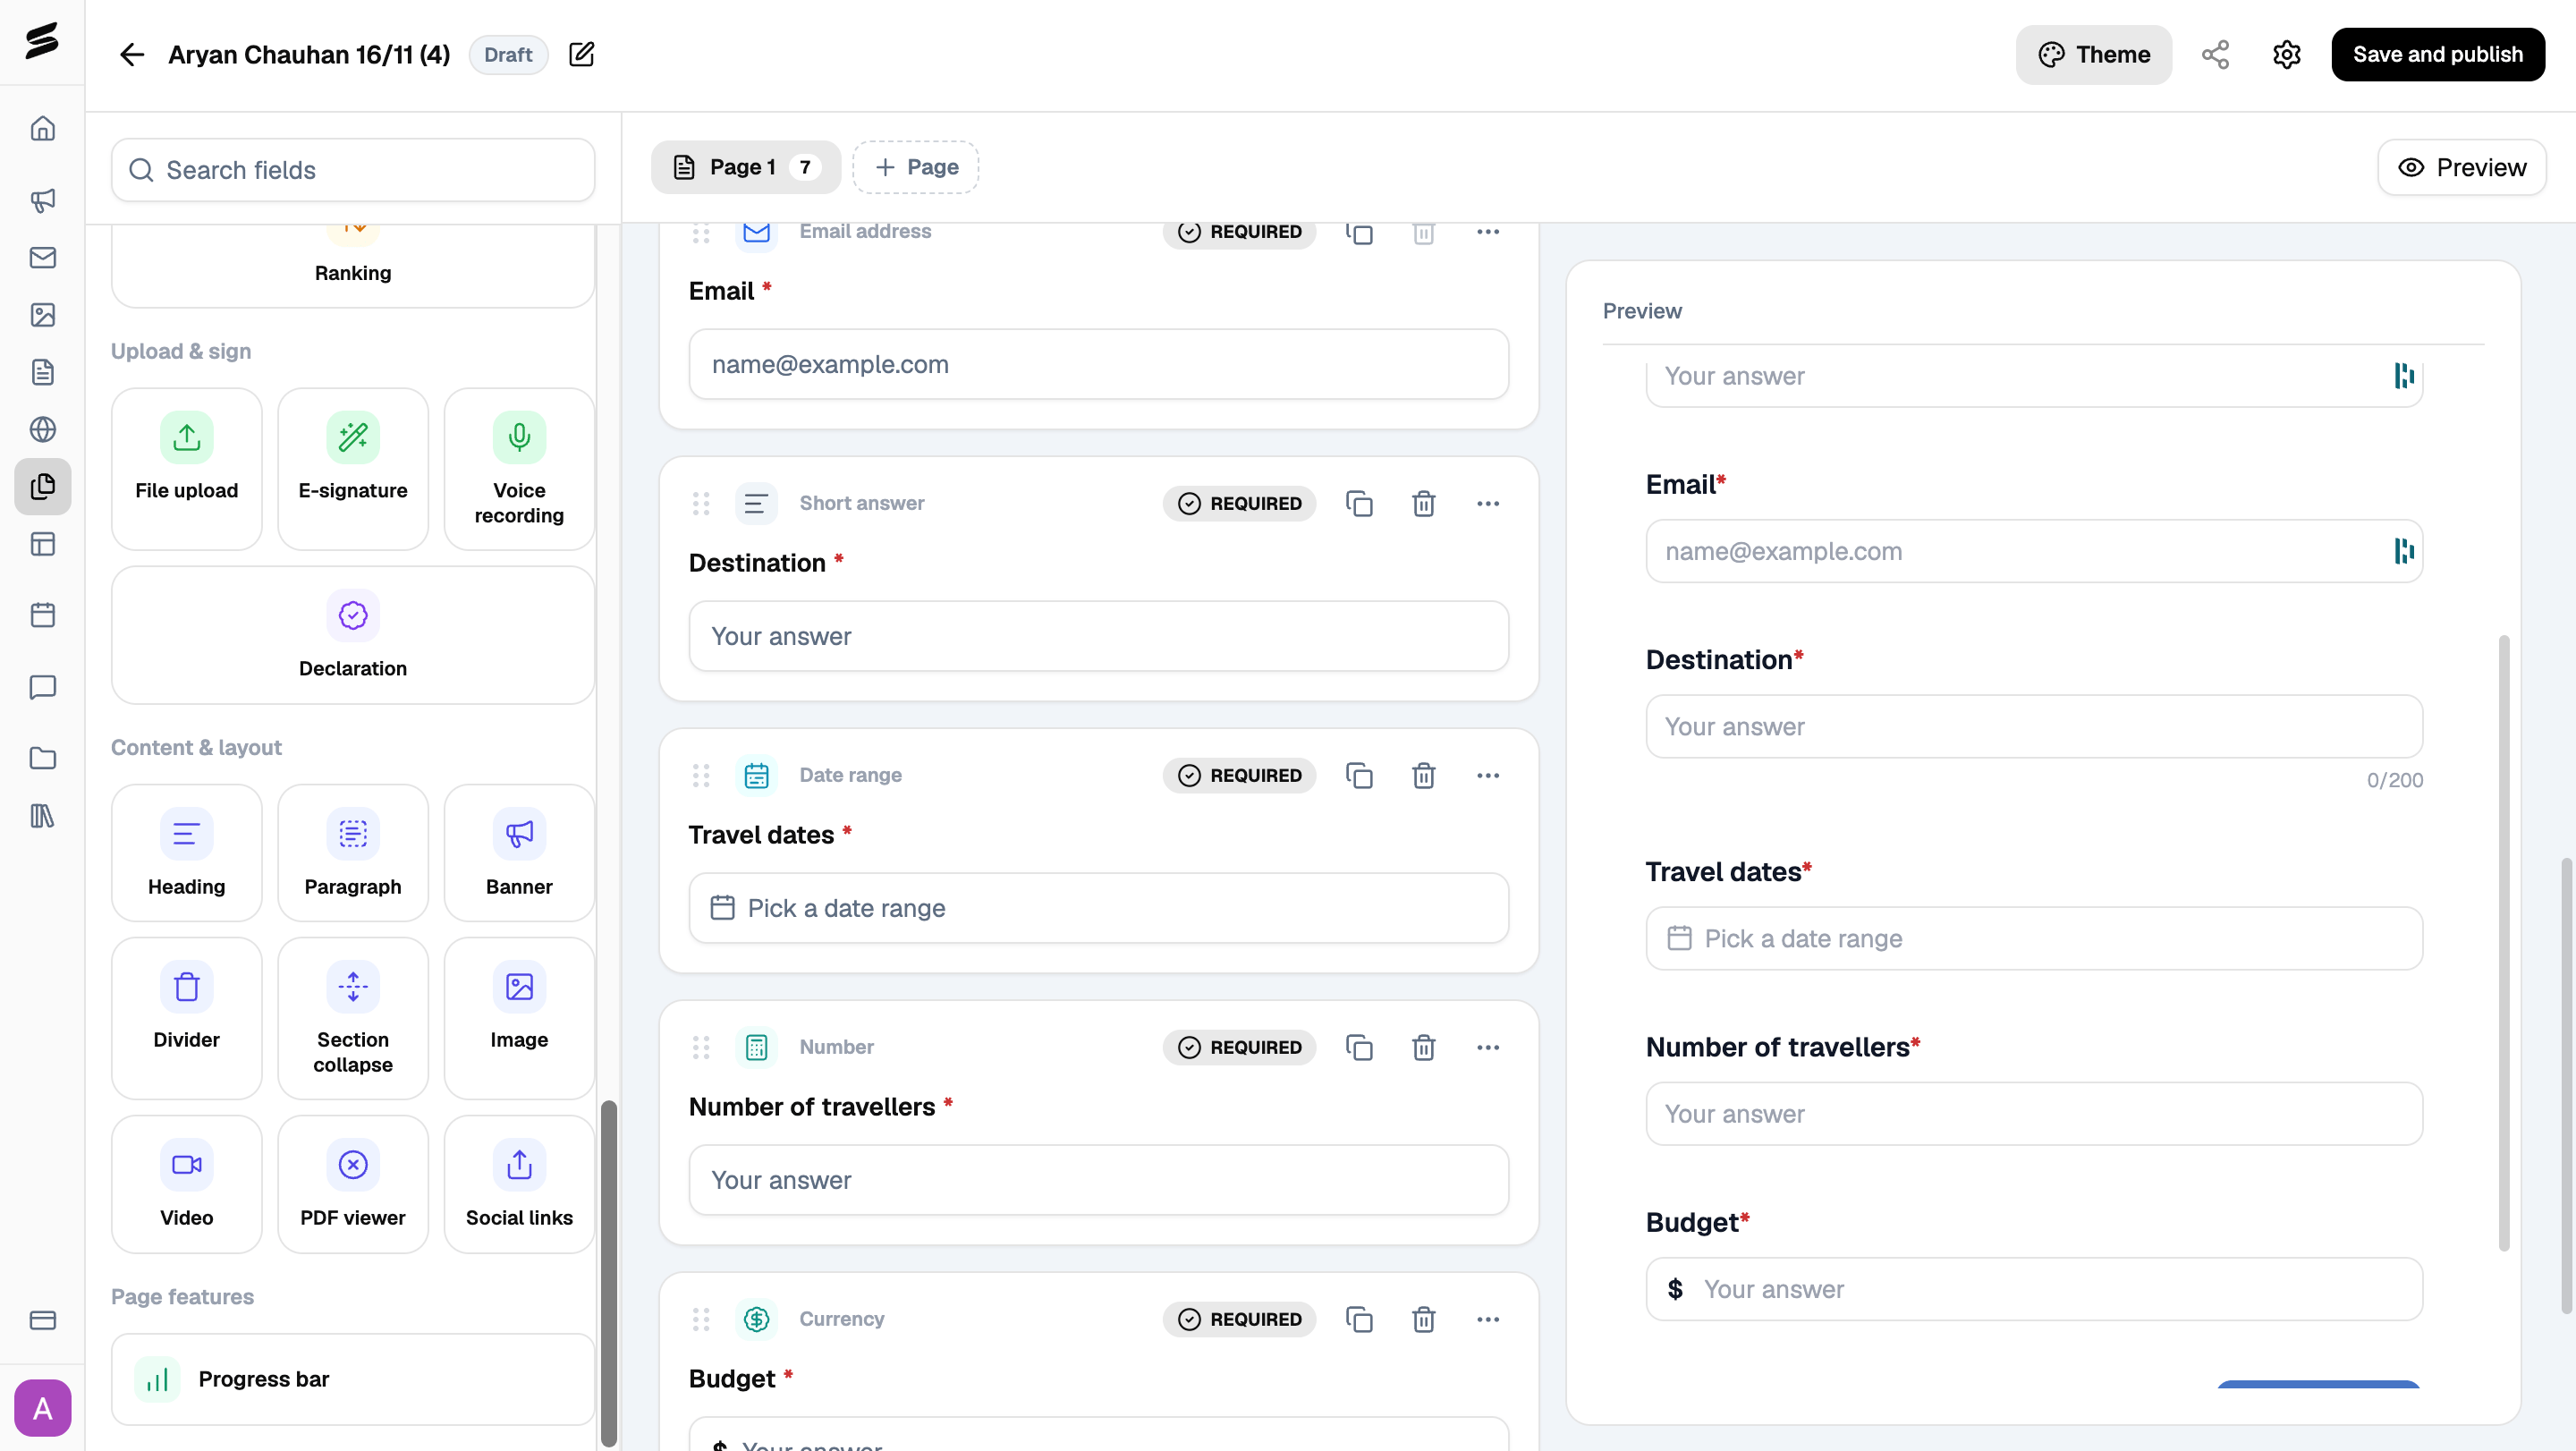
Every field you add appears as a row in your form builder. You can:- Reorder: drag and drop fields to change their position.
- Required: mark a field as mandatory.
- Duplicate: create a copy of an existing field.
- Delete: remove a field you no longer need.
Explore more field options
The field library also includes additional categories for building more detailed forms.- Upload & sign: File upload, E-signature, Voice recording, Declaration.
- Content & layout: Heading, Paragraph, Banner, Divider, Section collapse, Image, Video, PDF viewer, Social links.
- Page features: Progress bar.
Add content with the slash menu
You can also type/ inside a description or text field to open a quick menu. From there, you can access AI-written content and basic text blocks, such as headings, without leaving the field you’re editing.
Choose a theme
Want to customize how your form looks to clients? Click Theme in the top bar to explore the available styles. Skyie offers four themes: Light, Dark, Eco-friendly, and Charcoal. Select a theme to preview how your actual form will look before applying it.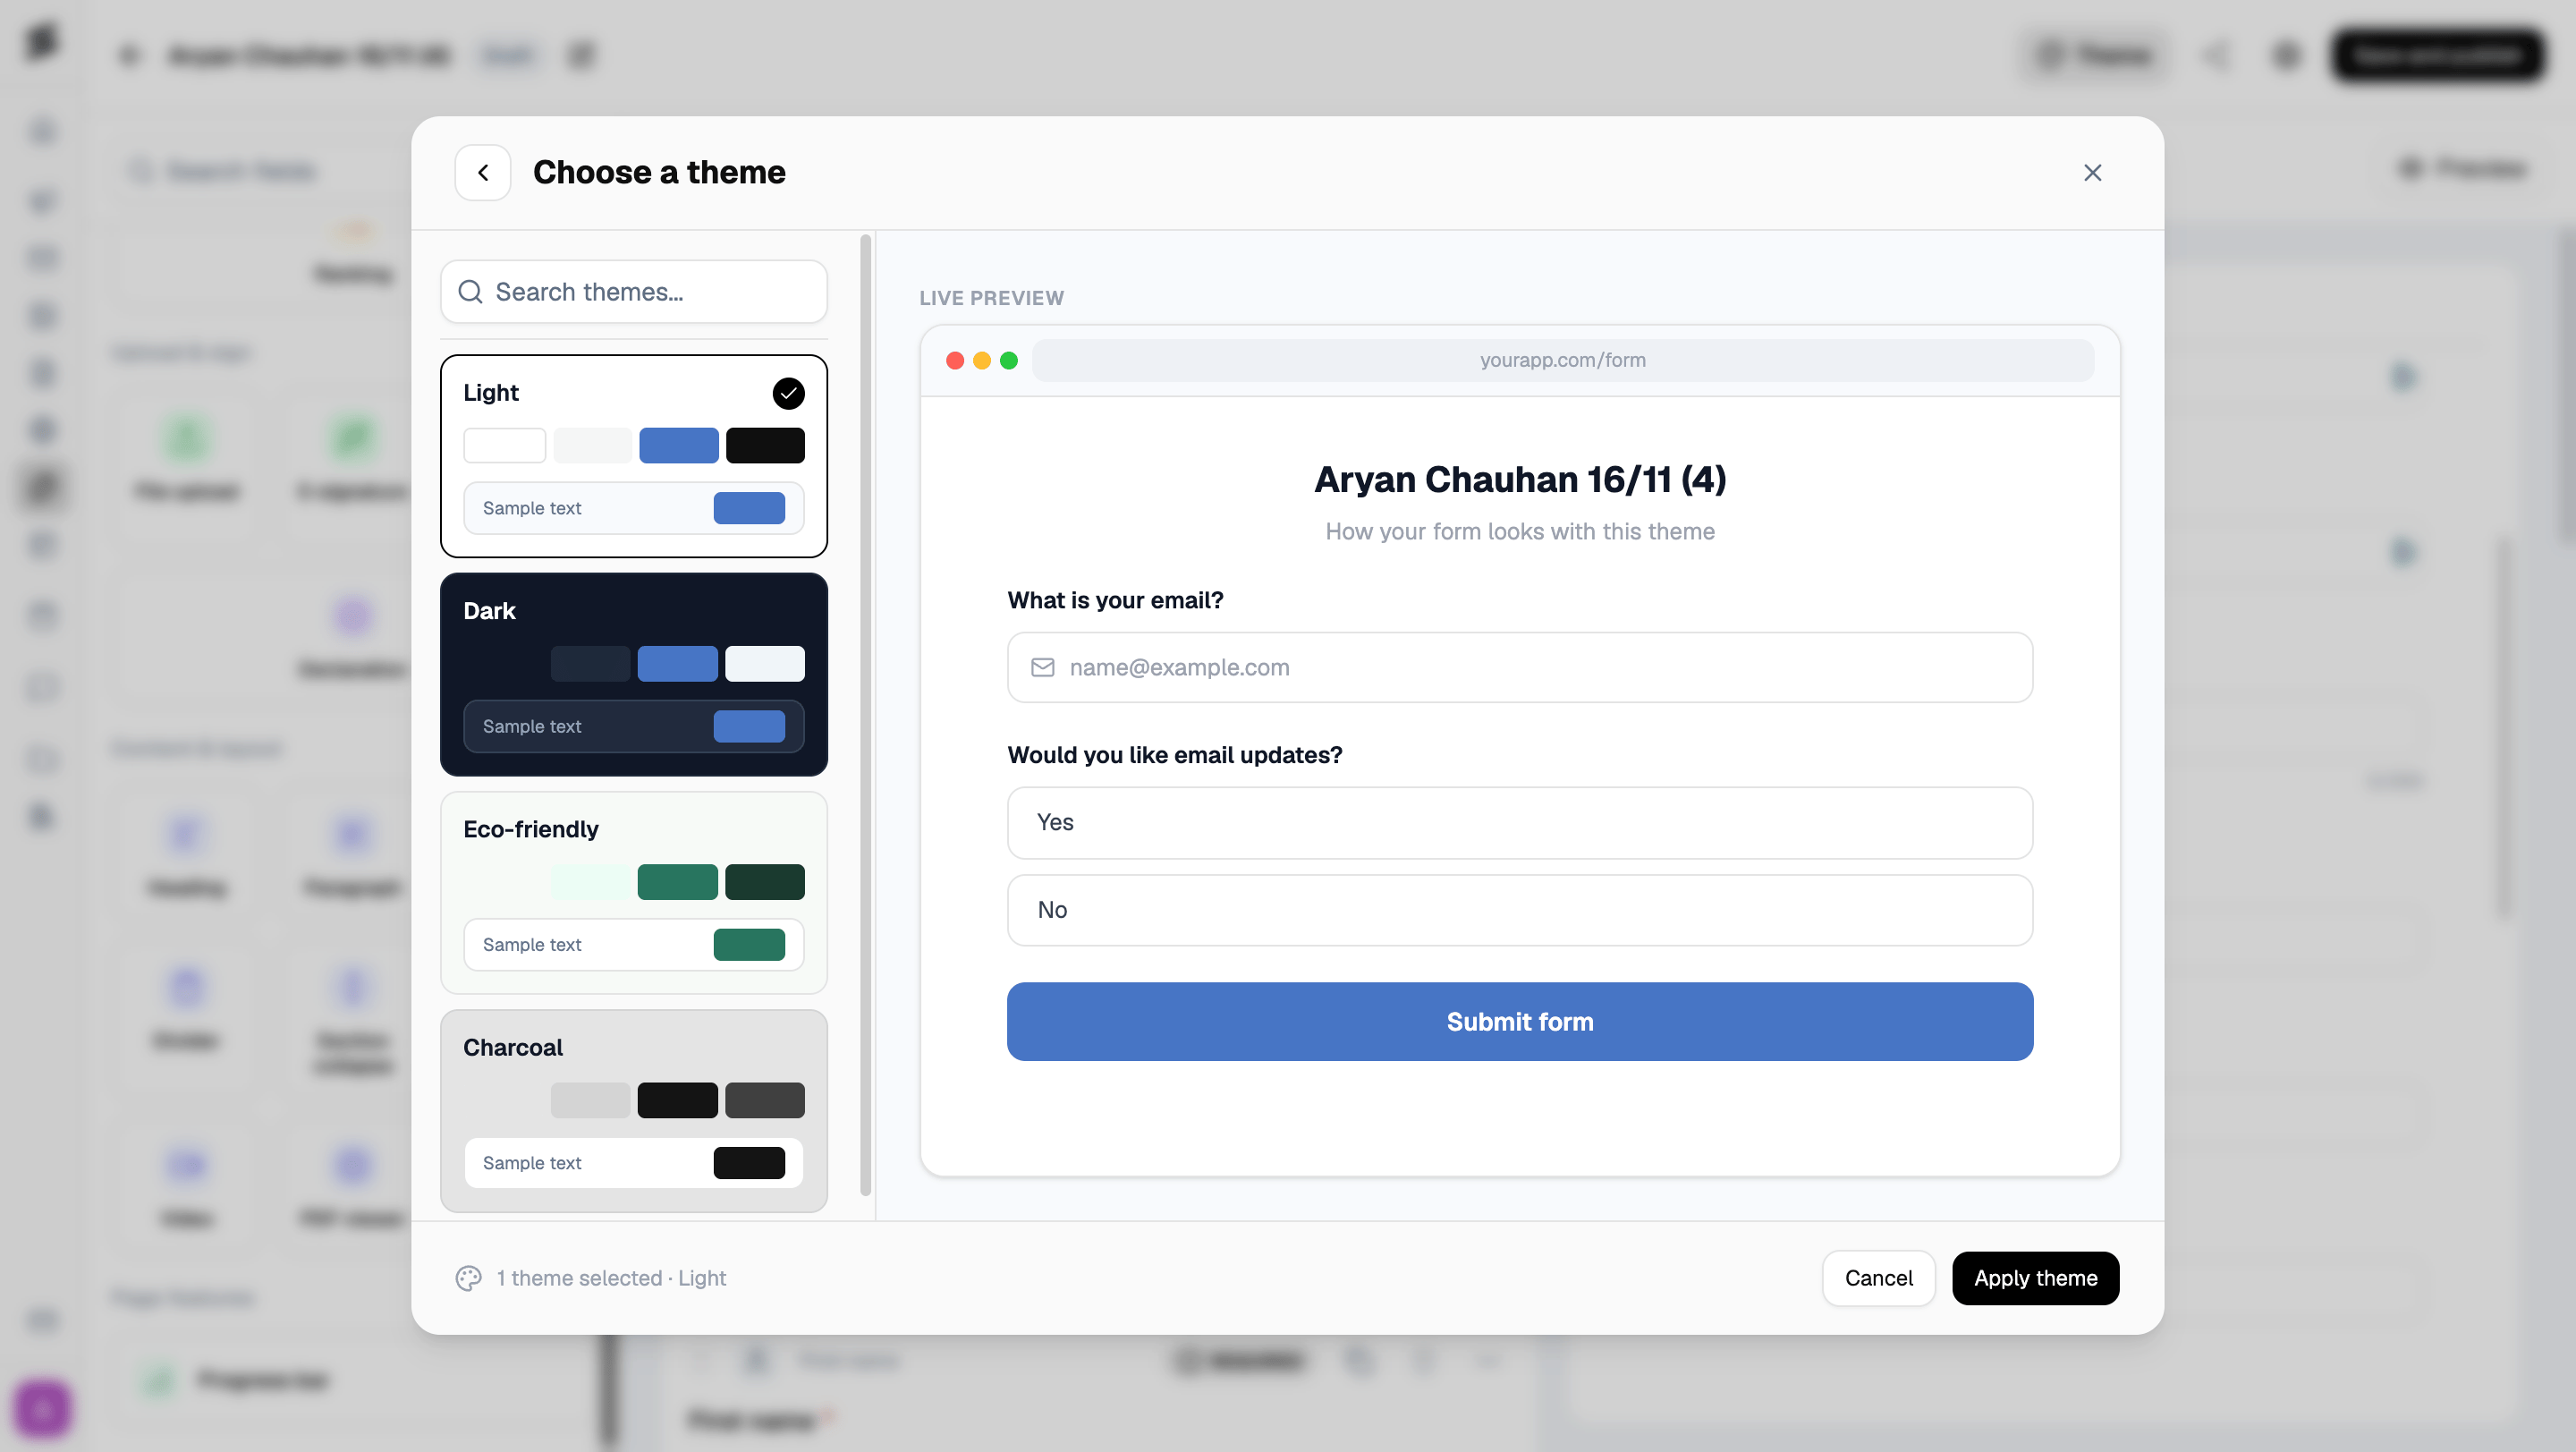
Configure your form settings
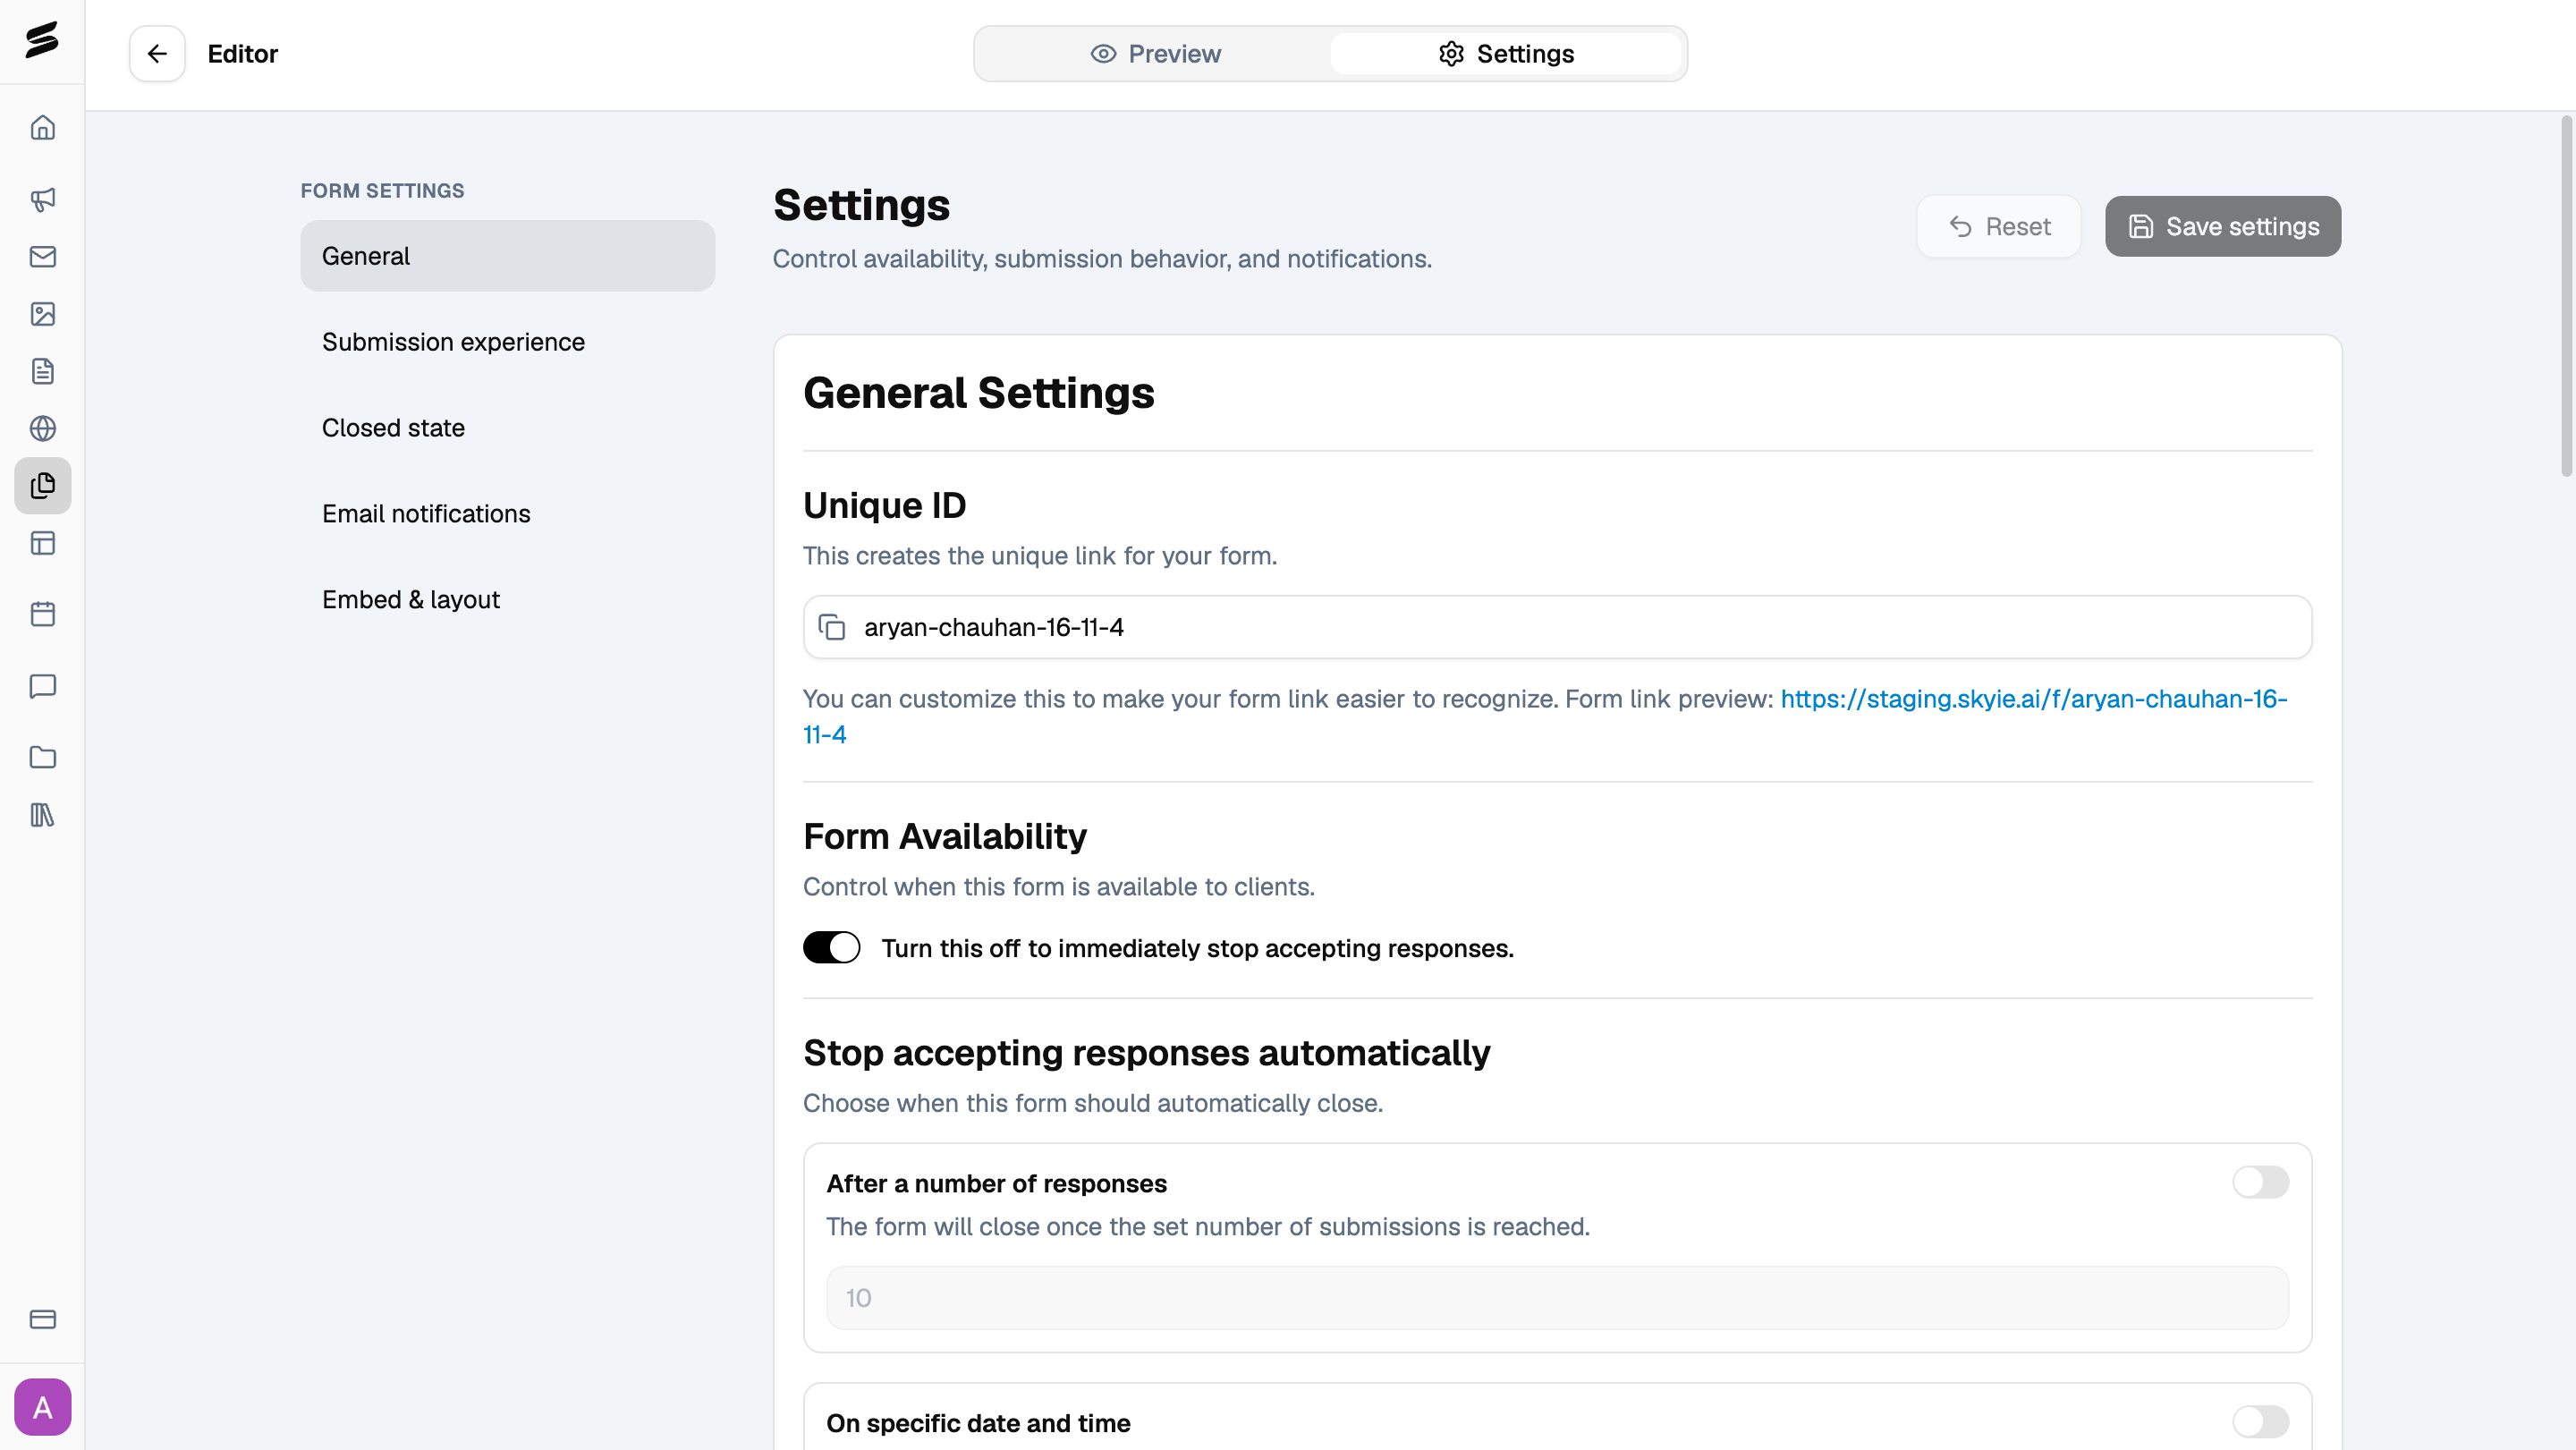
Click Settings in the top bar to control how your form works. The settings are organized into the following sections.General
Manage your form’s availability and sharing link.- Unique ID: customize the ID used in your form’s shareable link.
- Form Availability: turn this off to stop accepting responses.
- Automatic closing: set a response limit or choose a specific date and time when your form should close automatically.
Submission experience
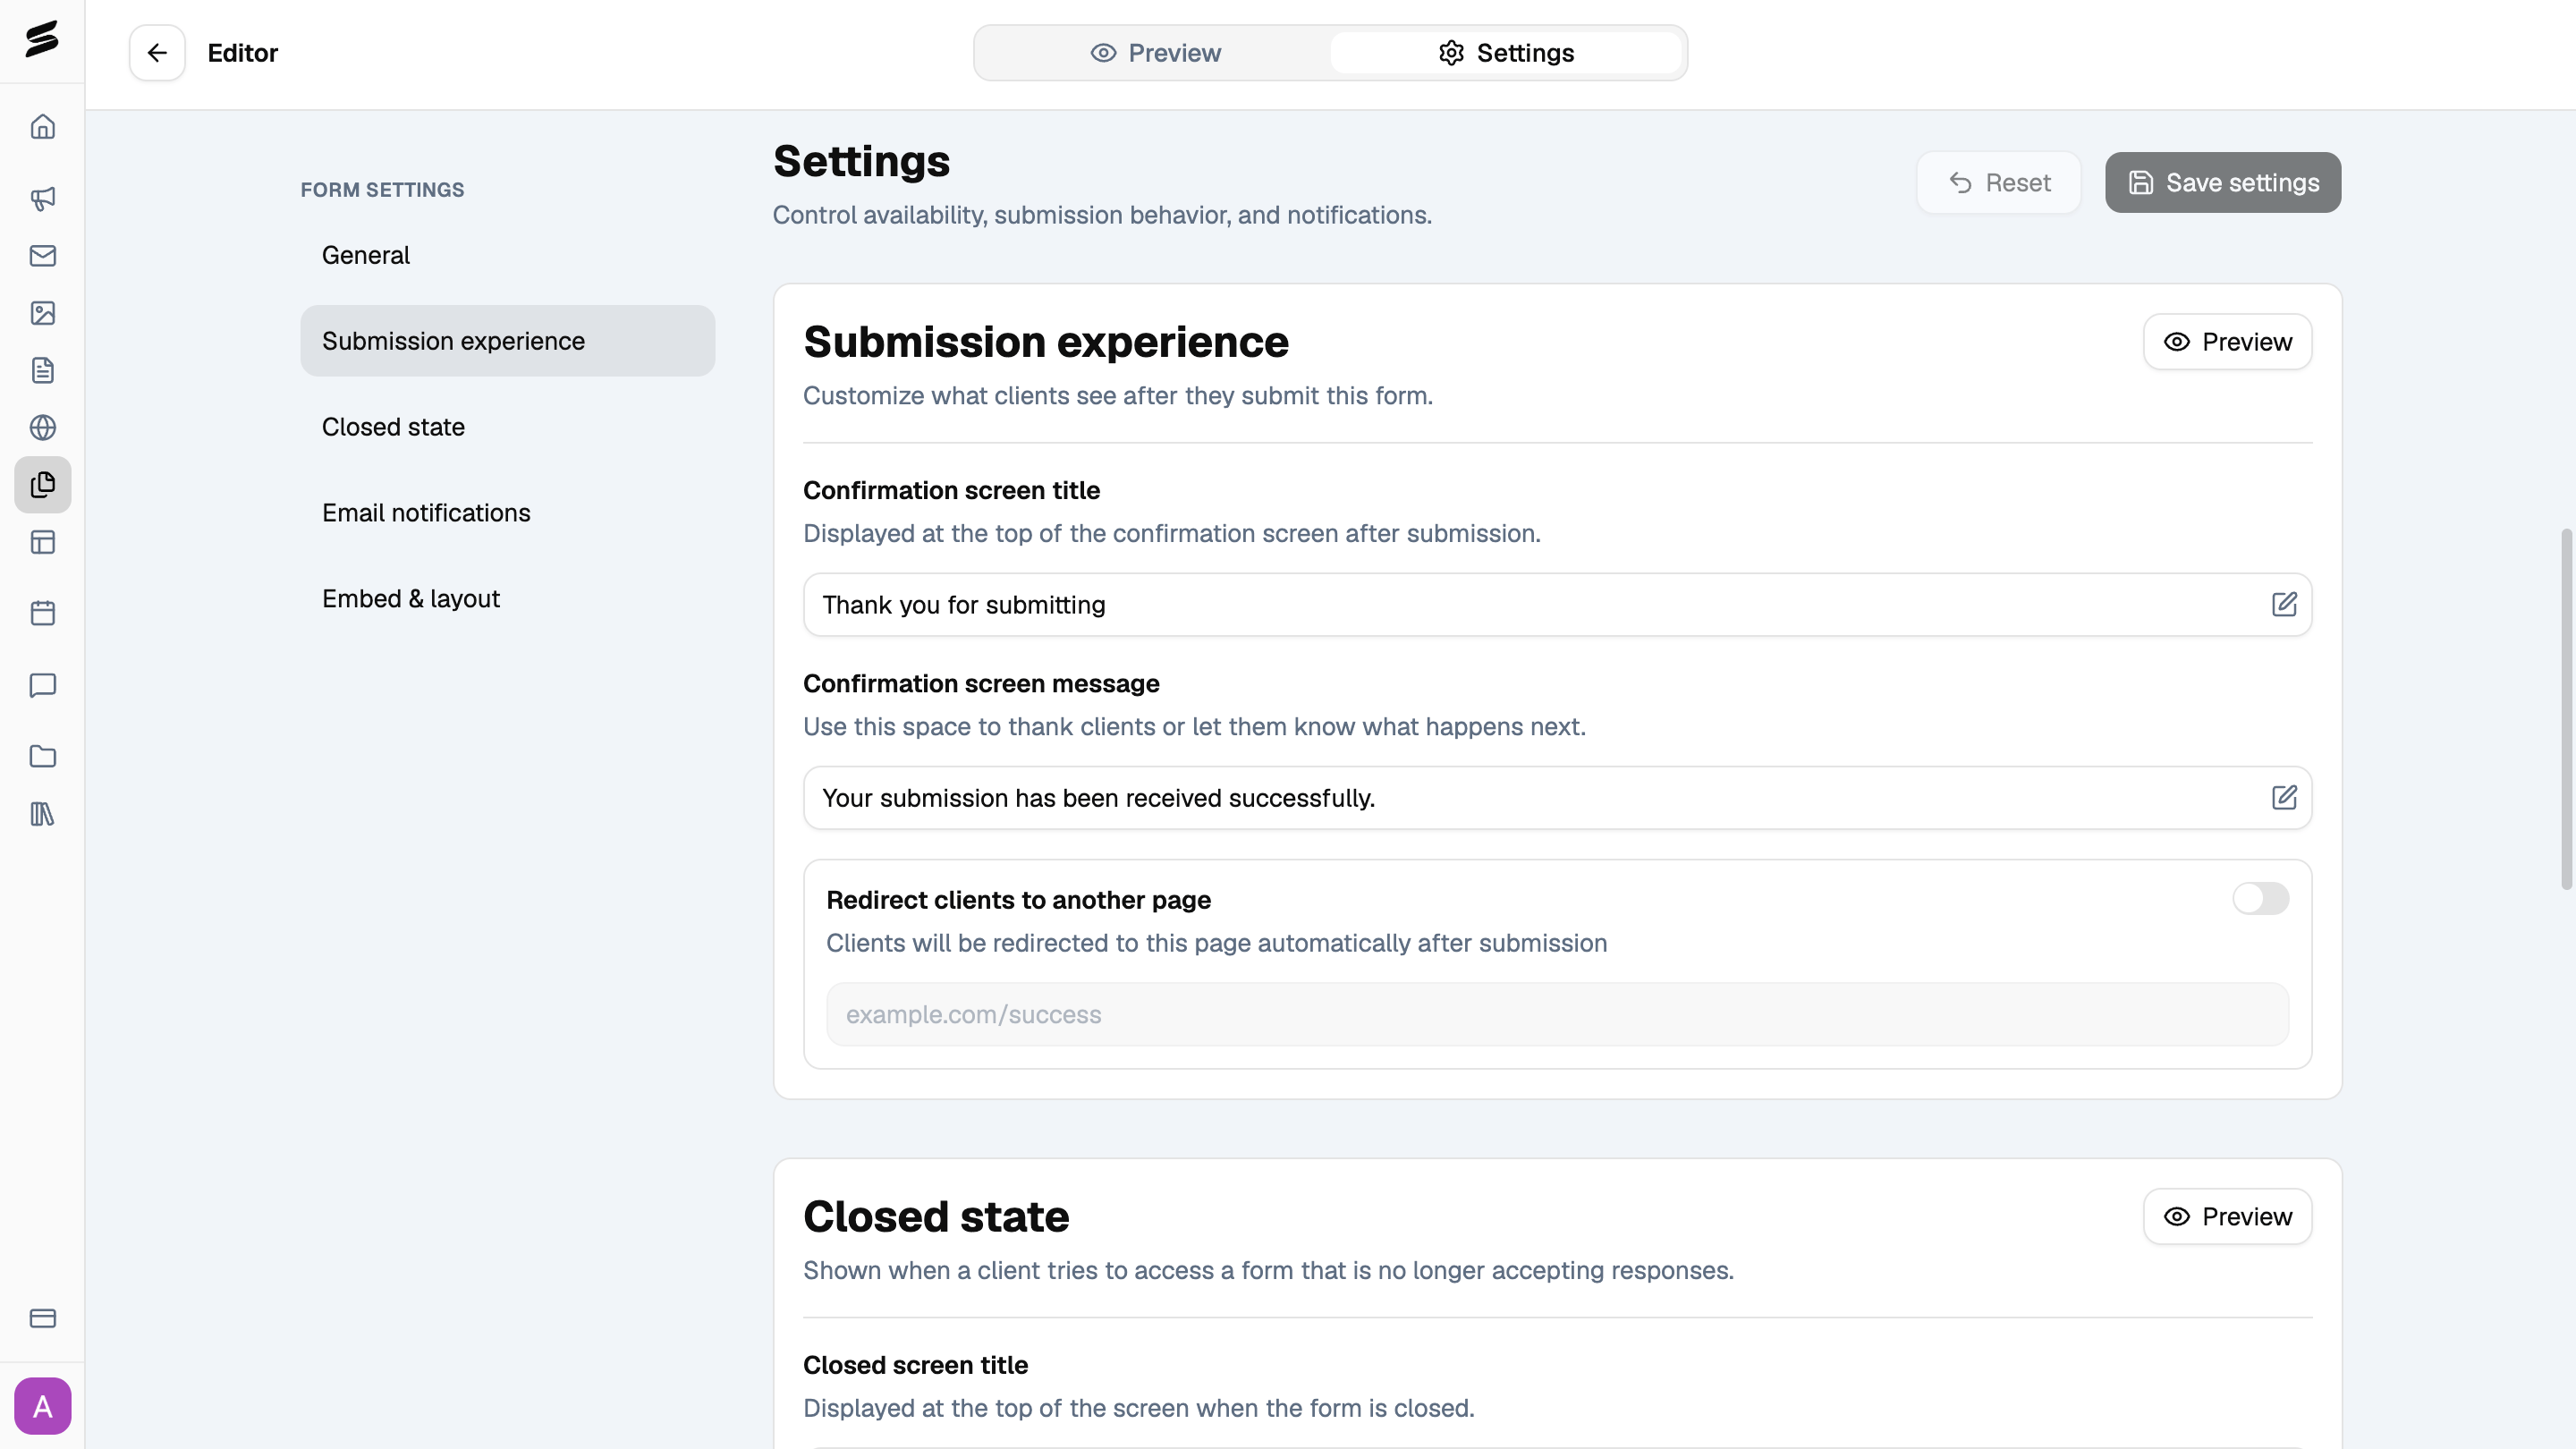
Choose what clients see after submitting your form.- Confirmation screen title: set the heading displayed after submission.
- Confirmation screen message: add a message to thank clients or explain what happens next.
- Redirect clients to another page: enable this option to send clients to another page after submission.
Closed state
Customize the message clients see when they try to access a form that is no longer accepting responses. You can set the Closed screen title and Closed screen message.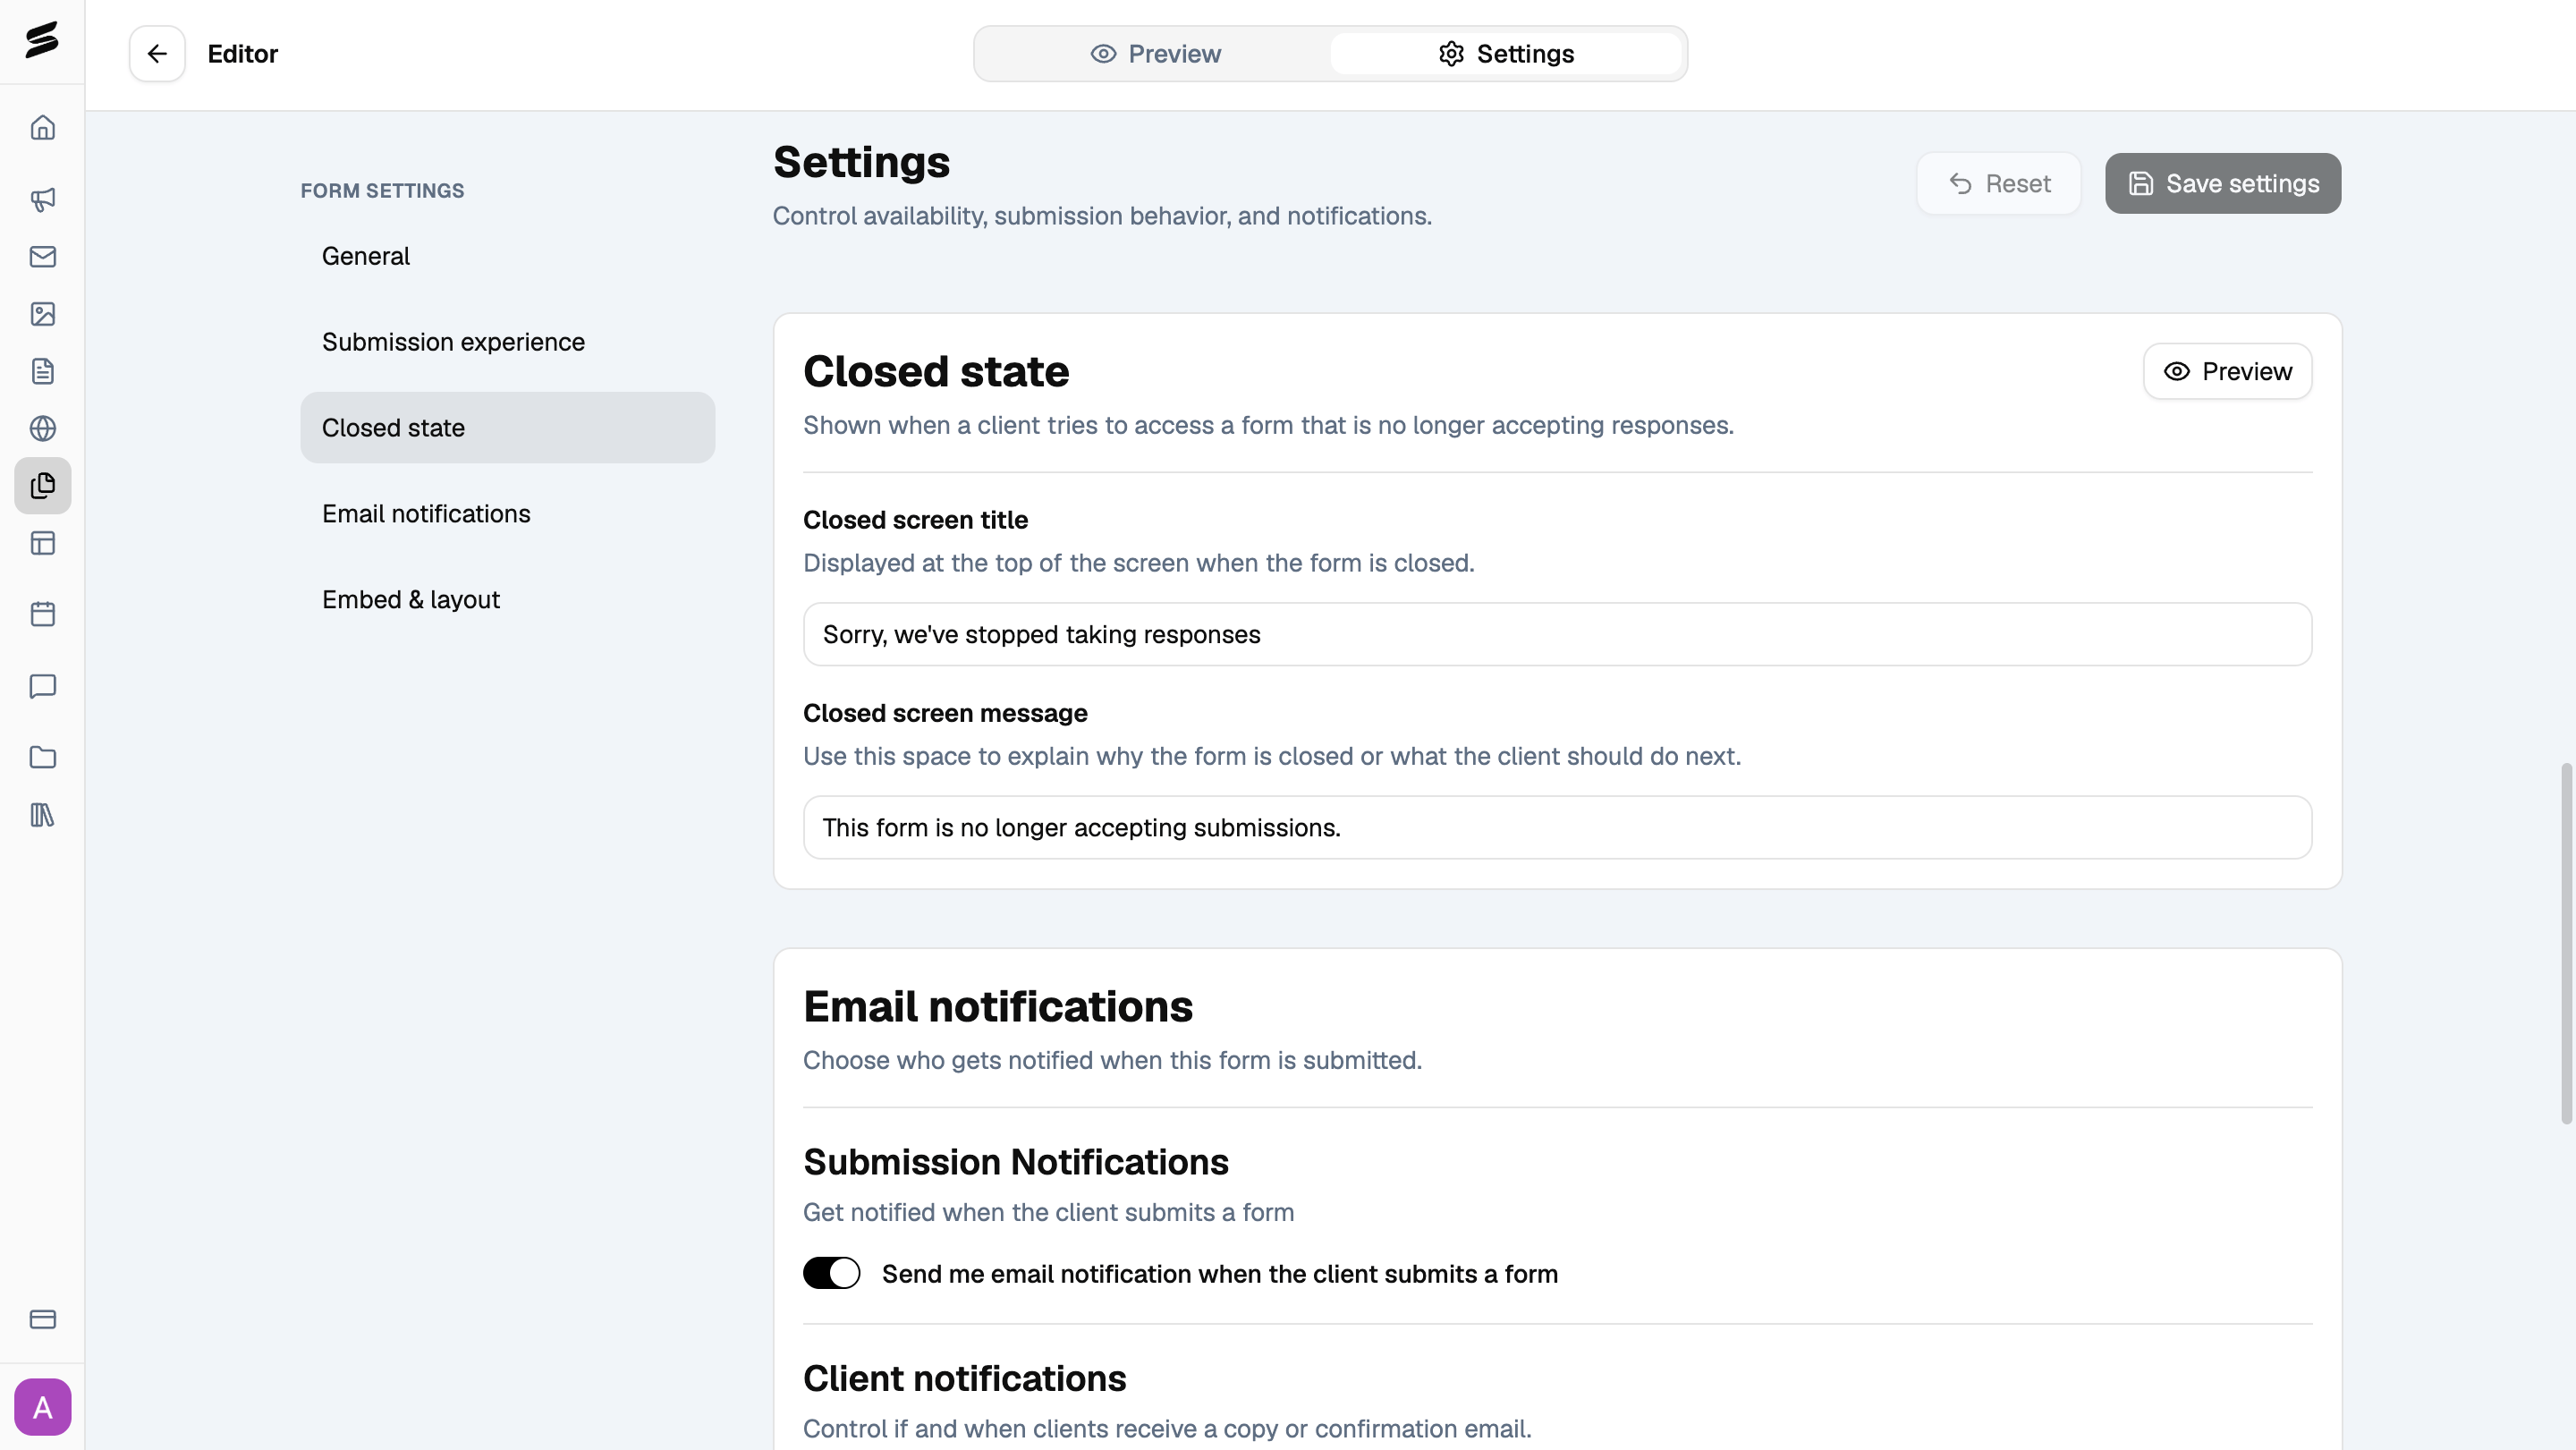
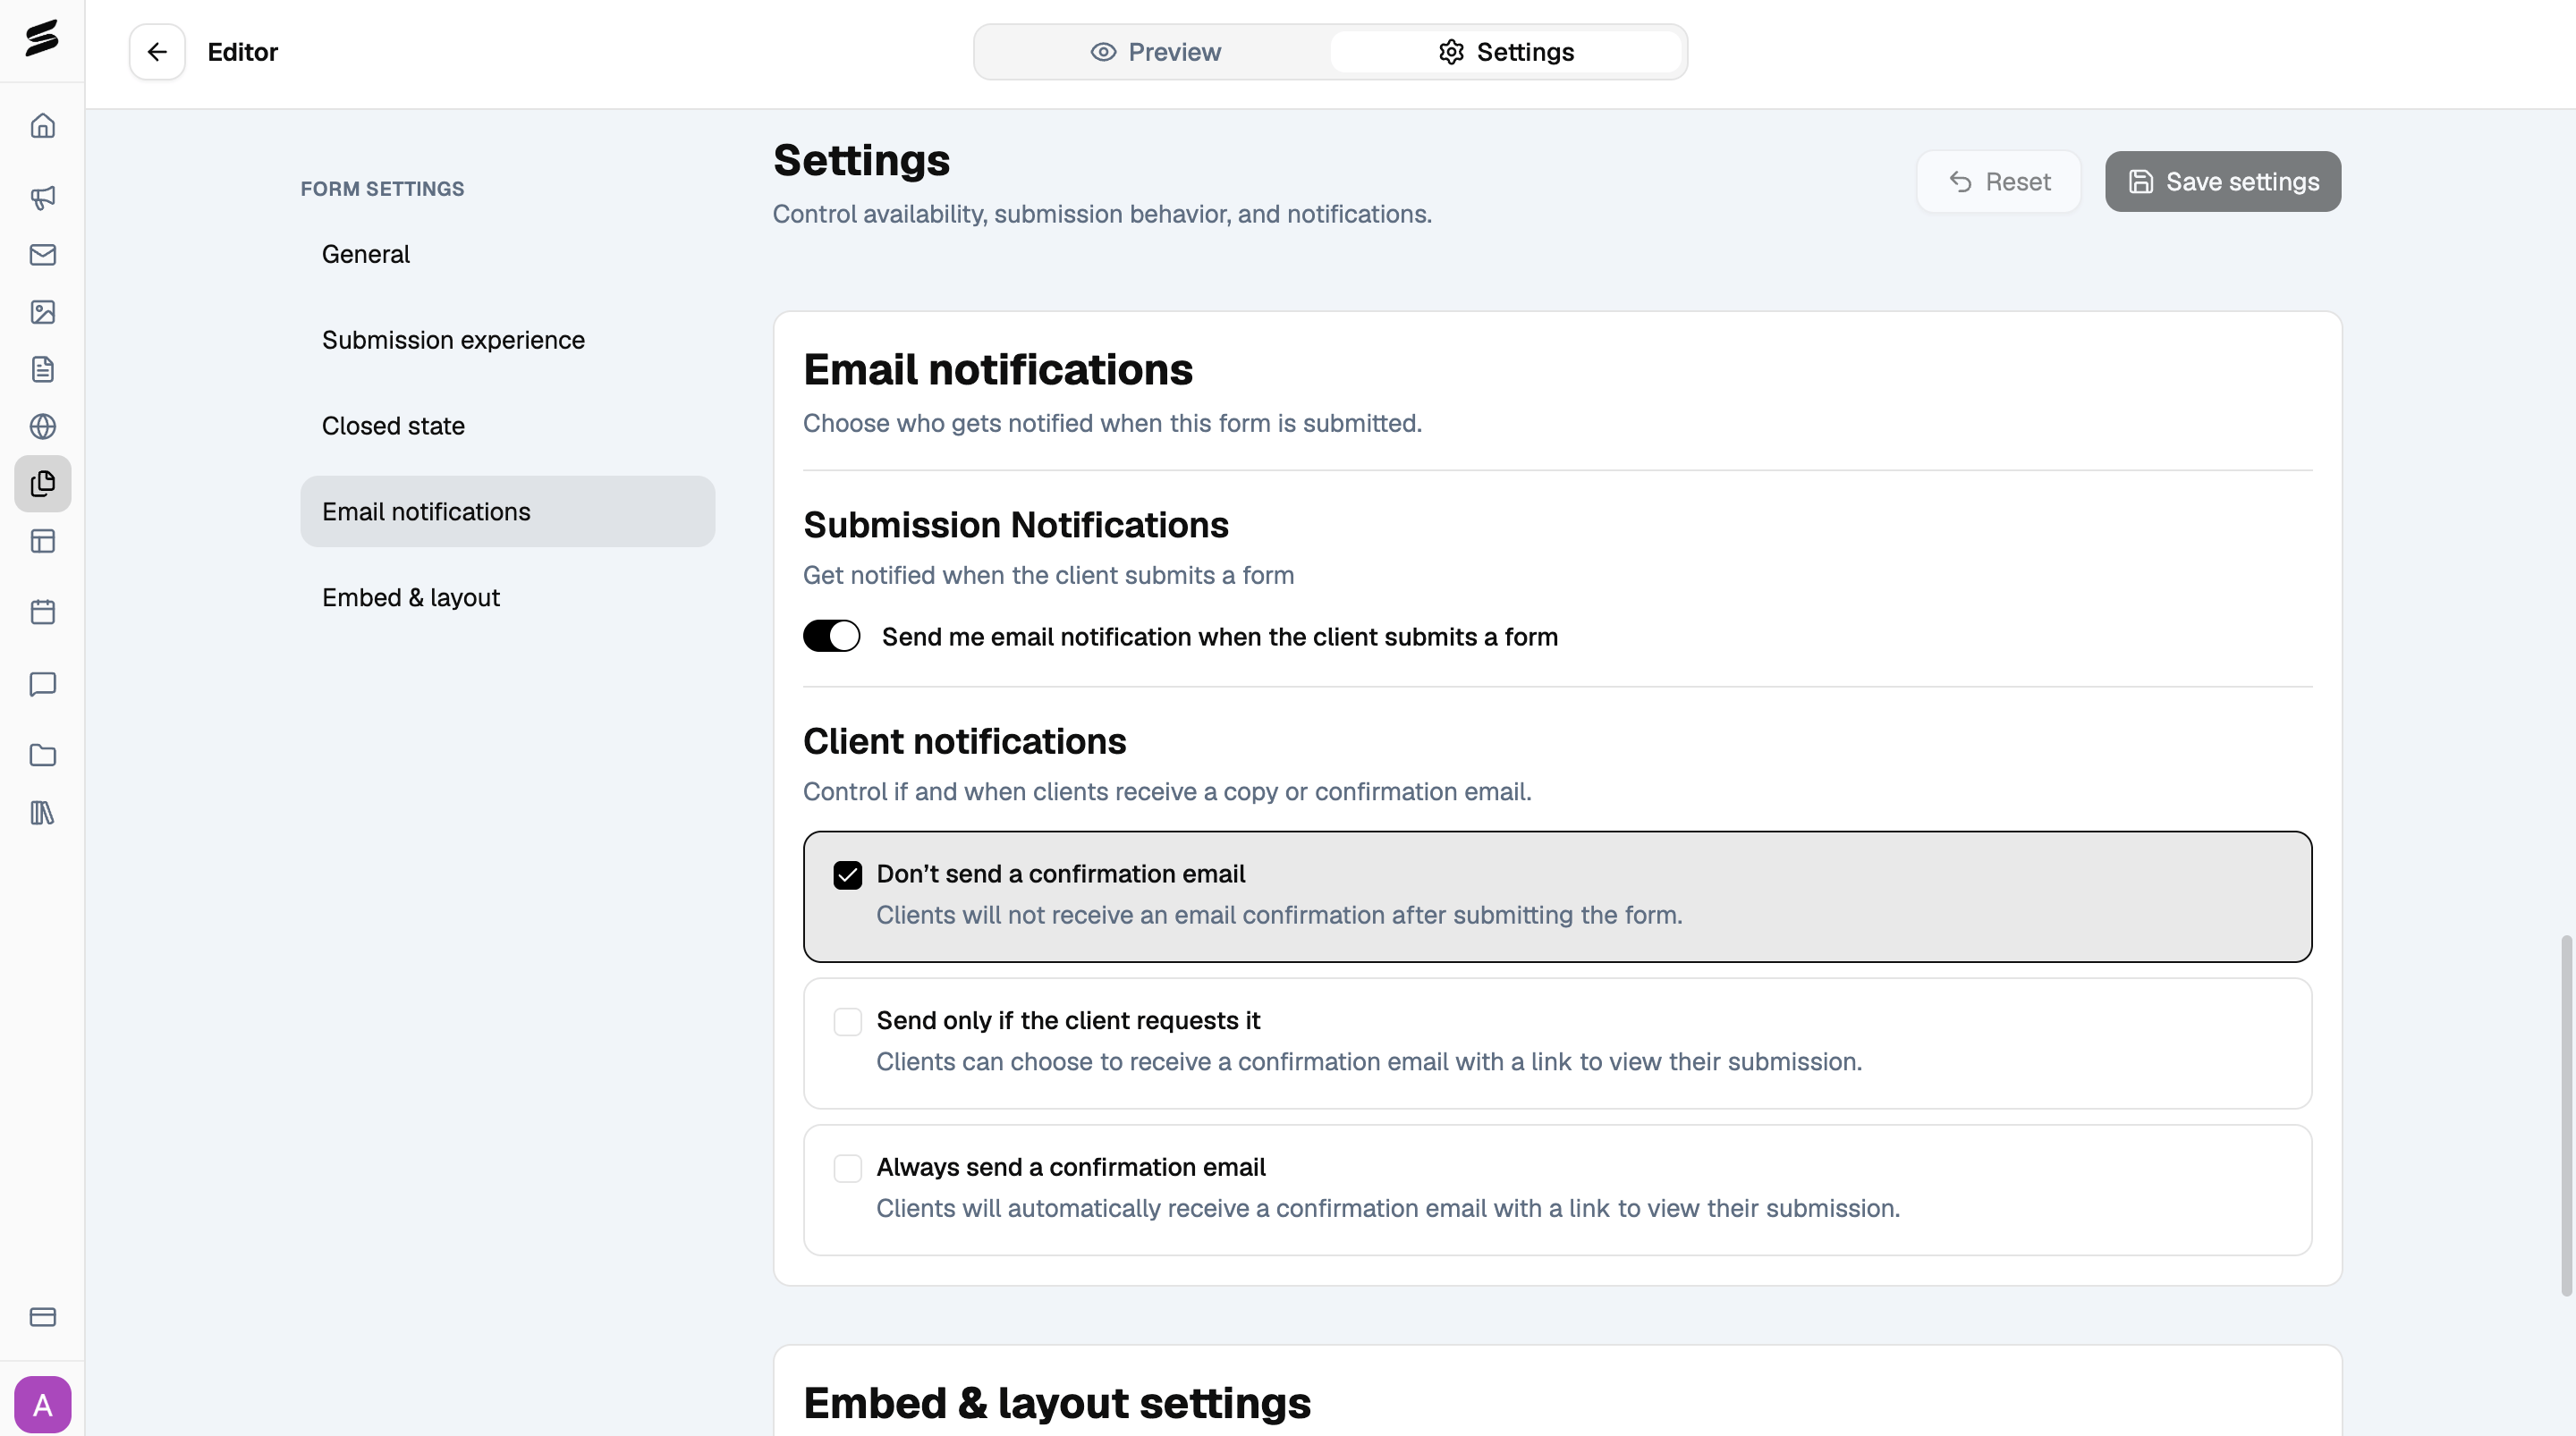
Email notifications
Choose which email notifications should be sent when someone submits your form. Turn on Send me email notification when the client submits a form to receive an email whenever a client submits a response. For client confirmation emails, choose one:- Don’t send a confirmation email: clients won’t receive an email after submitting.
- Send only if the client requests it: clients can choose whether they want a confirmation email.
- Always send a confirmation email: every client receives a confirmation email with a link to their submission.
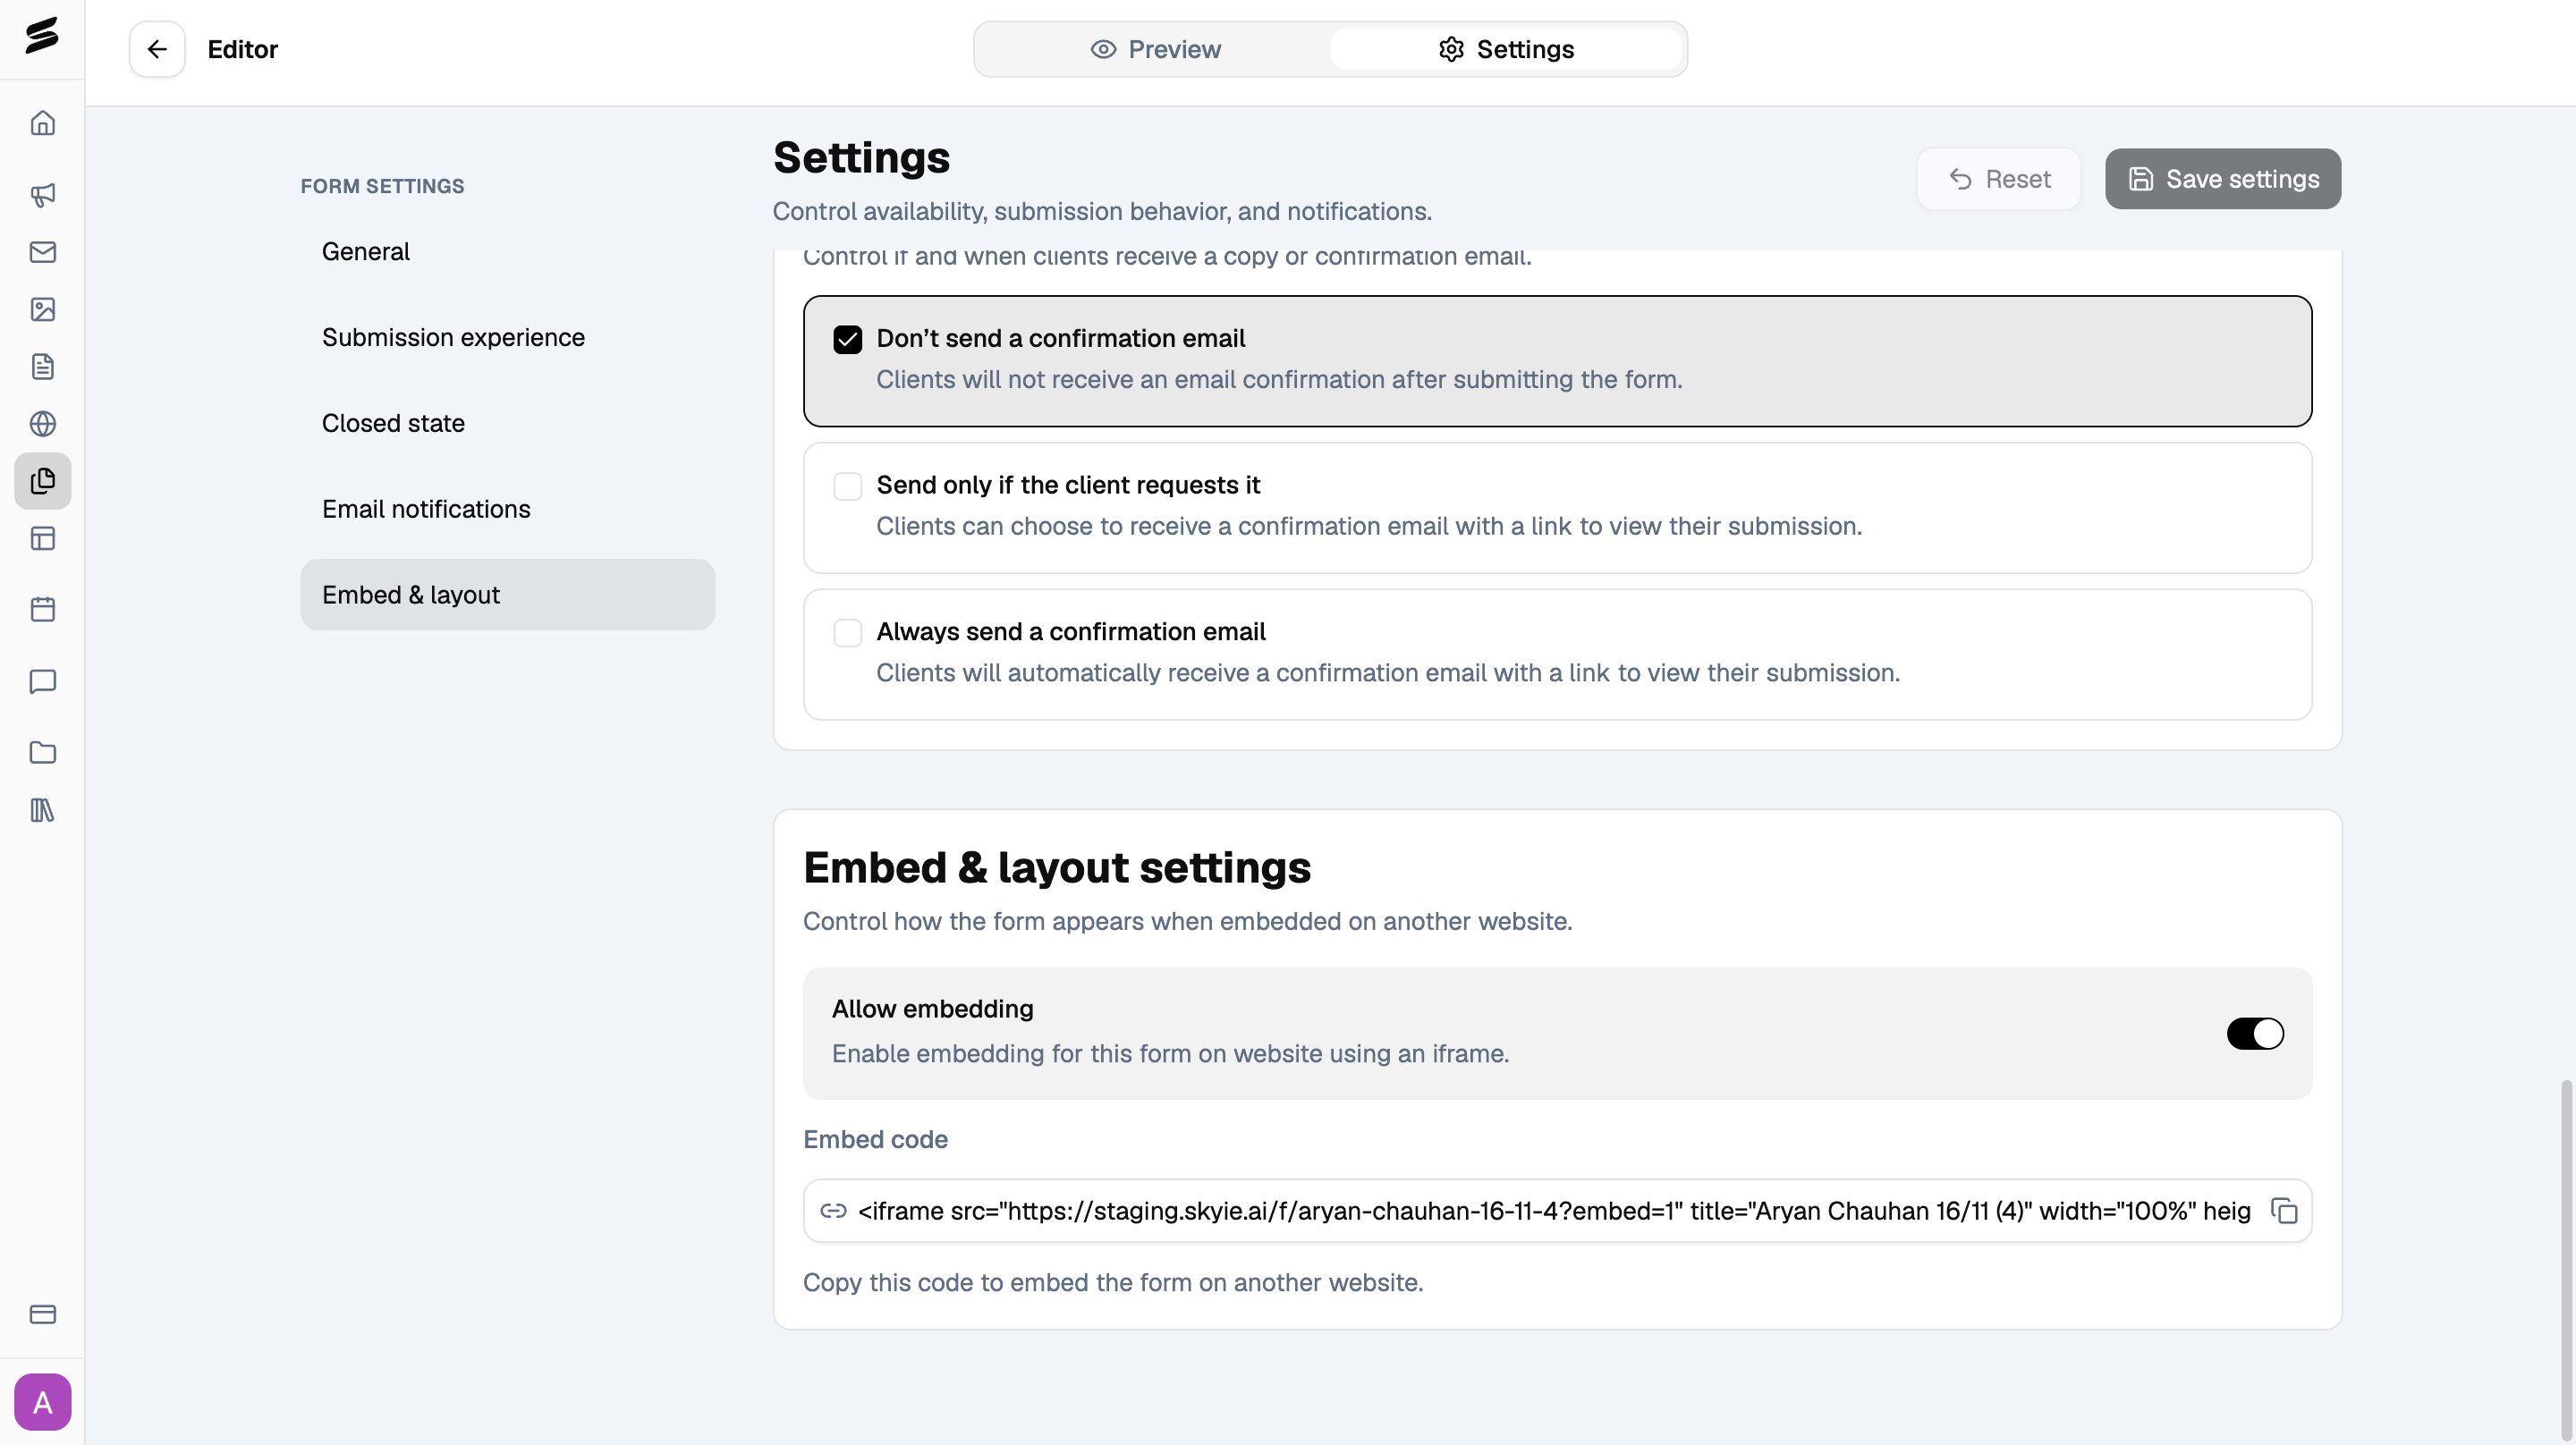
Embed & layout
Want to display your form directly on your website?- Turn on Allow embedding.
- Copy the generated Embed code.
- Add the iframe code to the page where you want the form to appear.
Publish your form
Once you’ve finished building and customizing your form, click Save and publish in the top right corner. Your form’s status changes from Draft to Live, and it starts accepting responses. You can then share its link with clients or embed it on your website.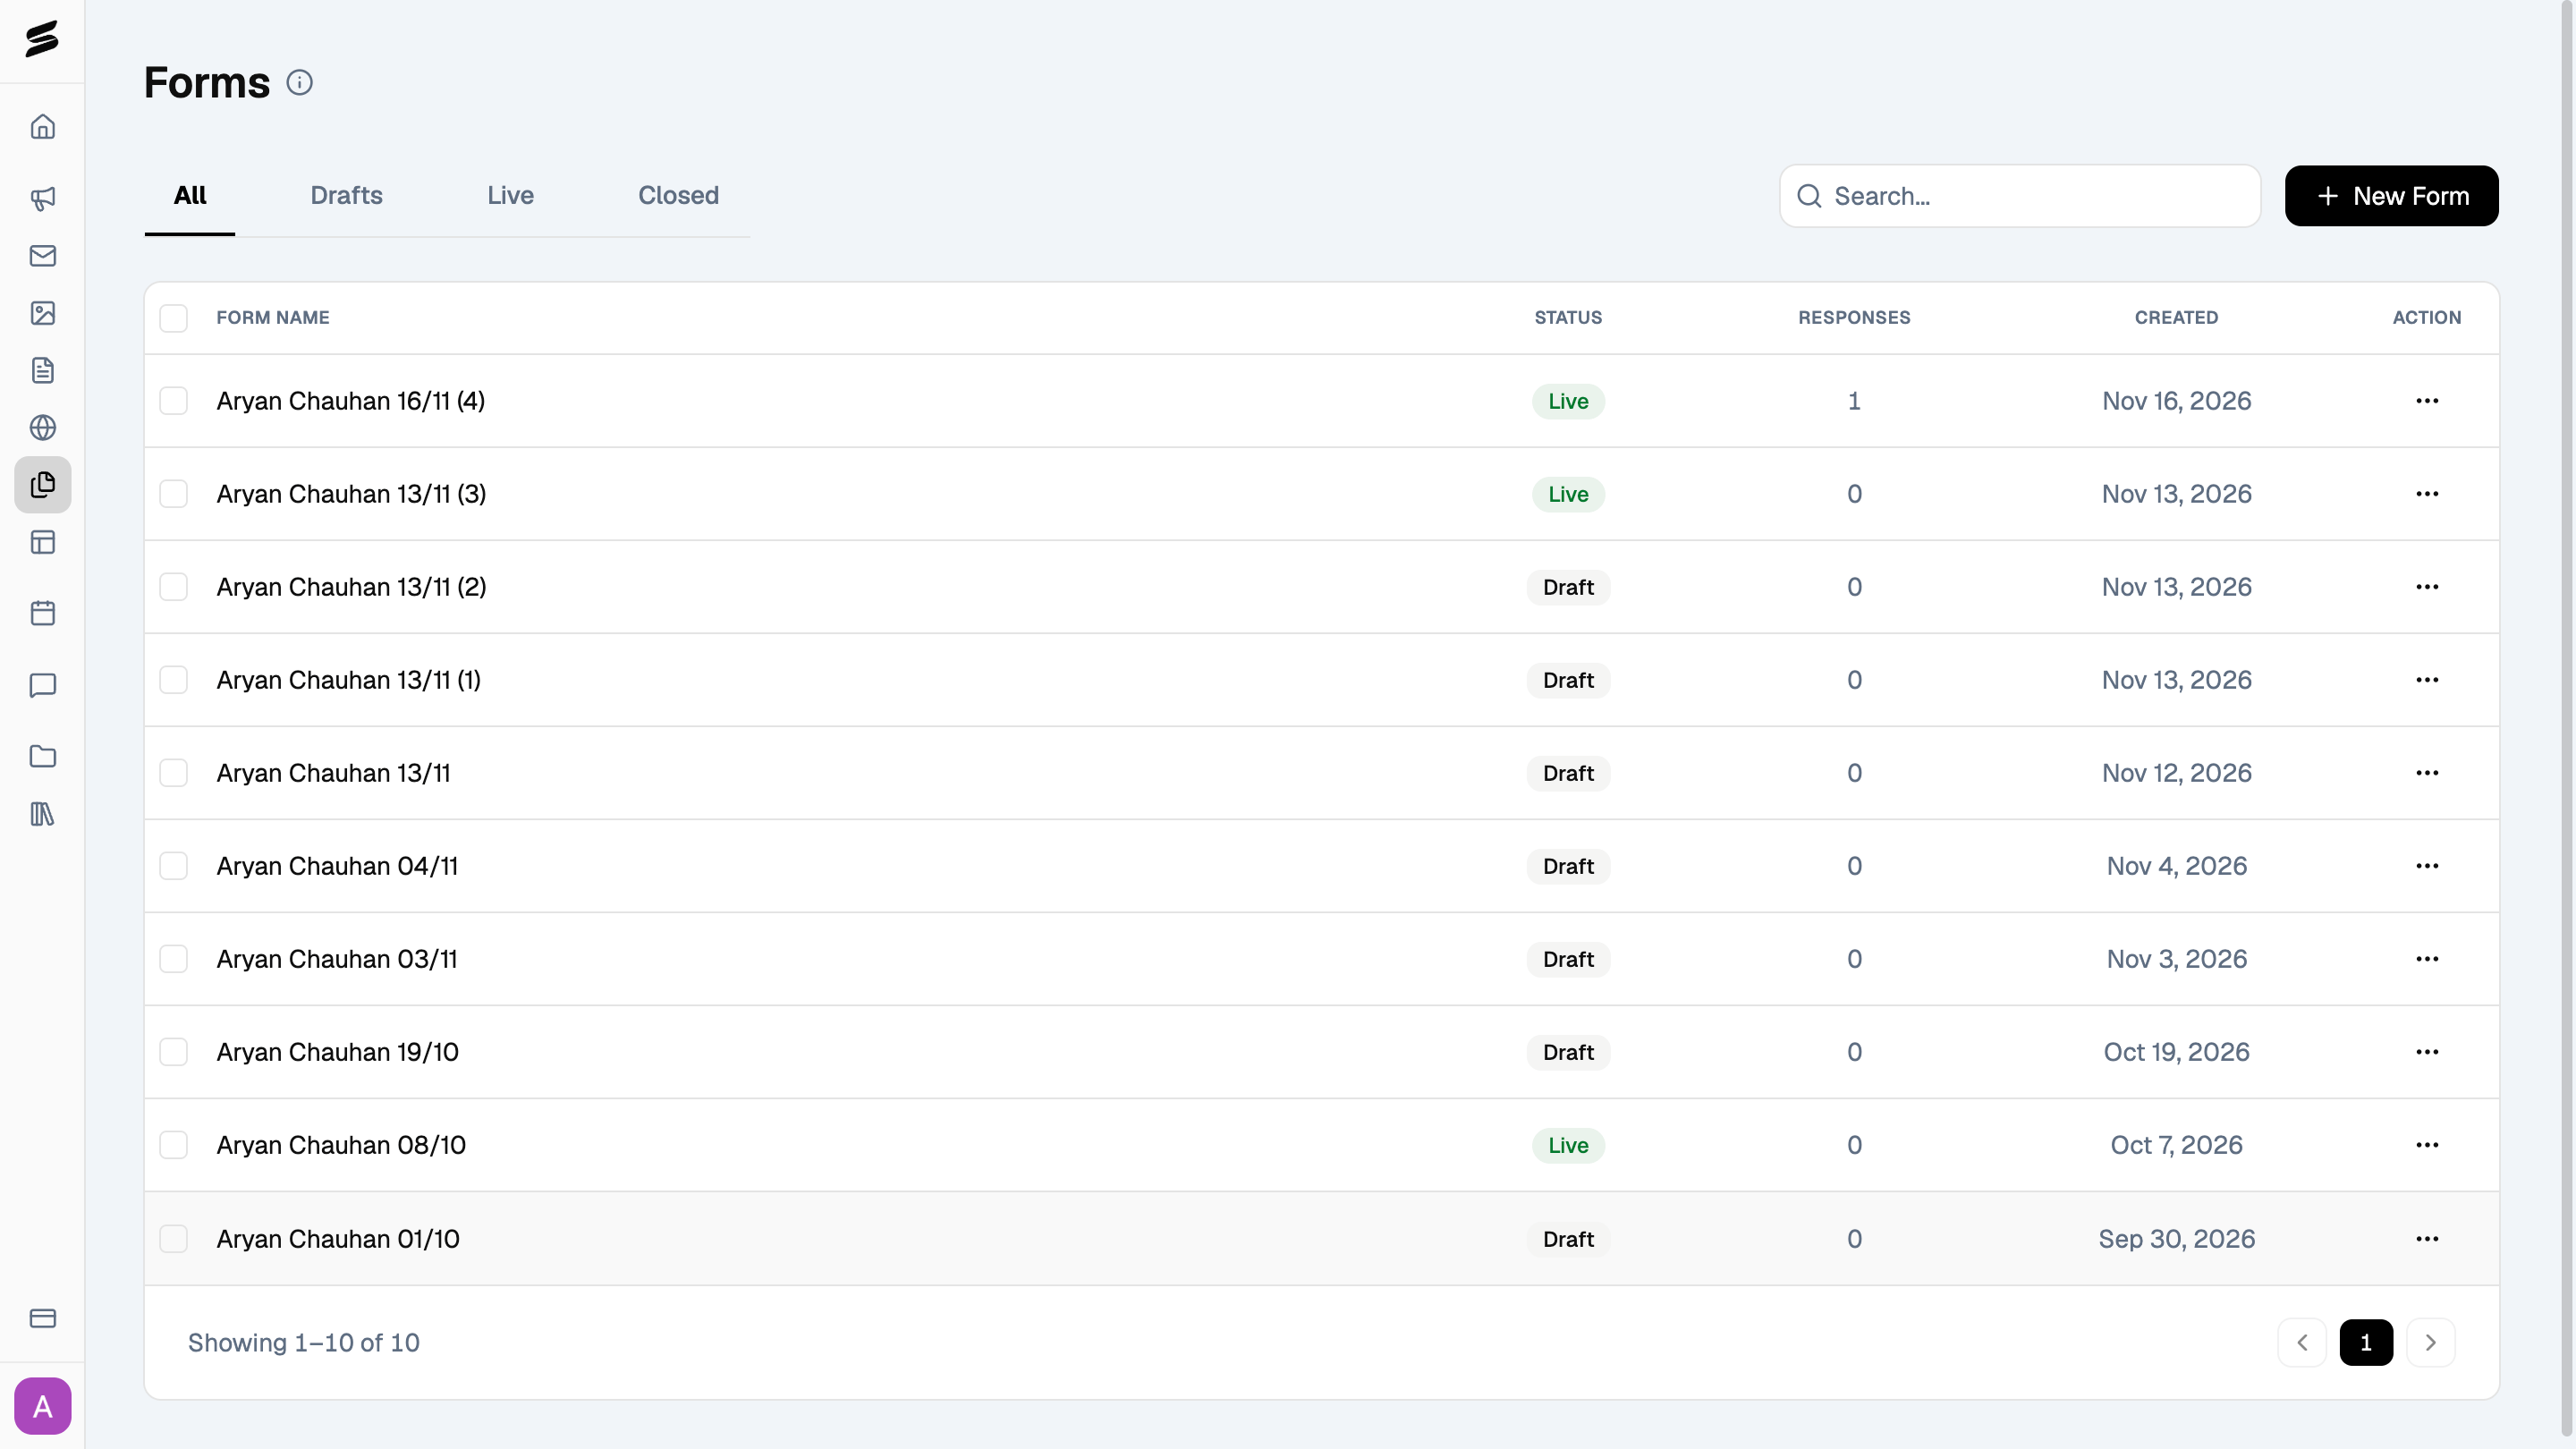
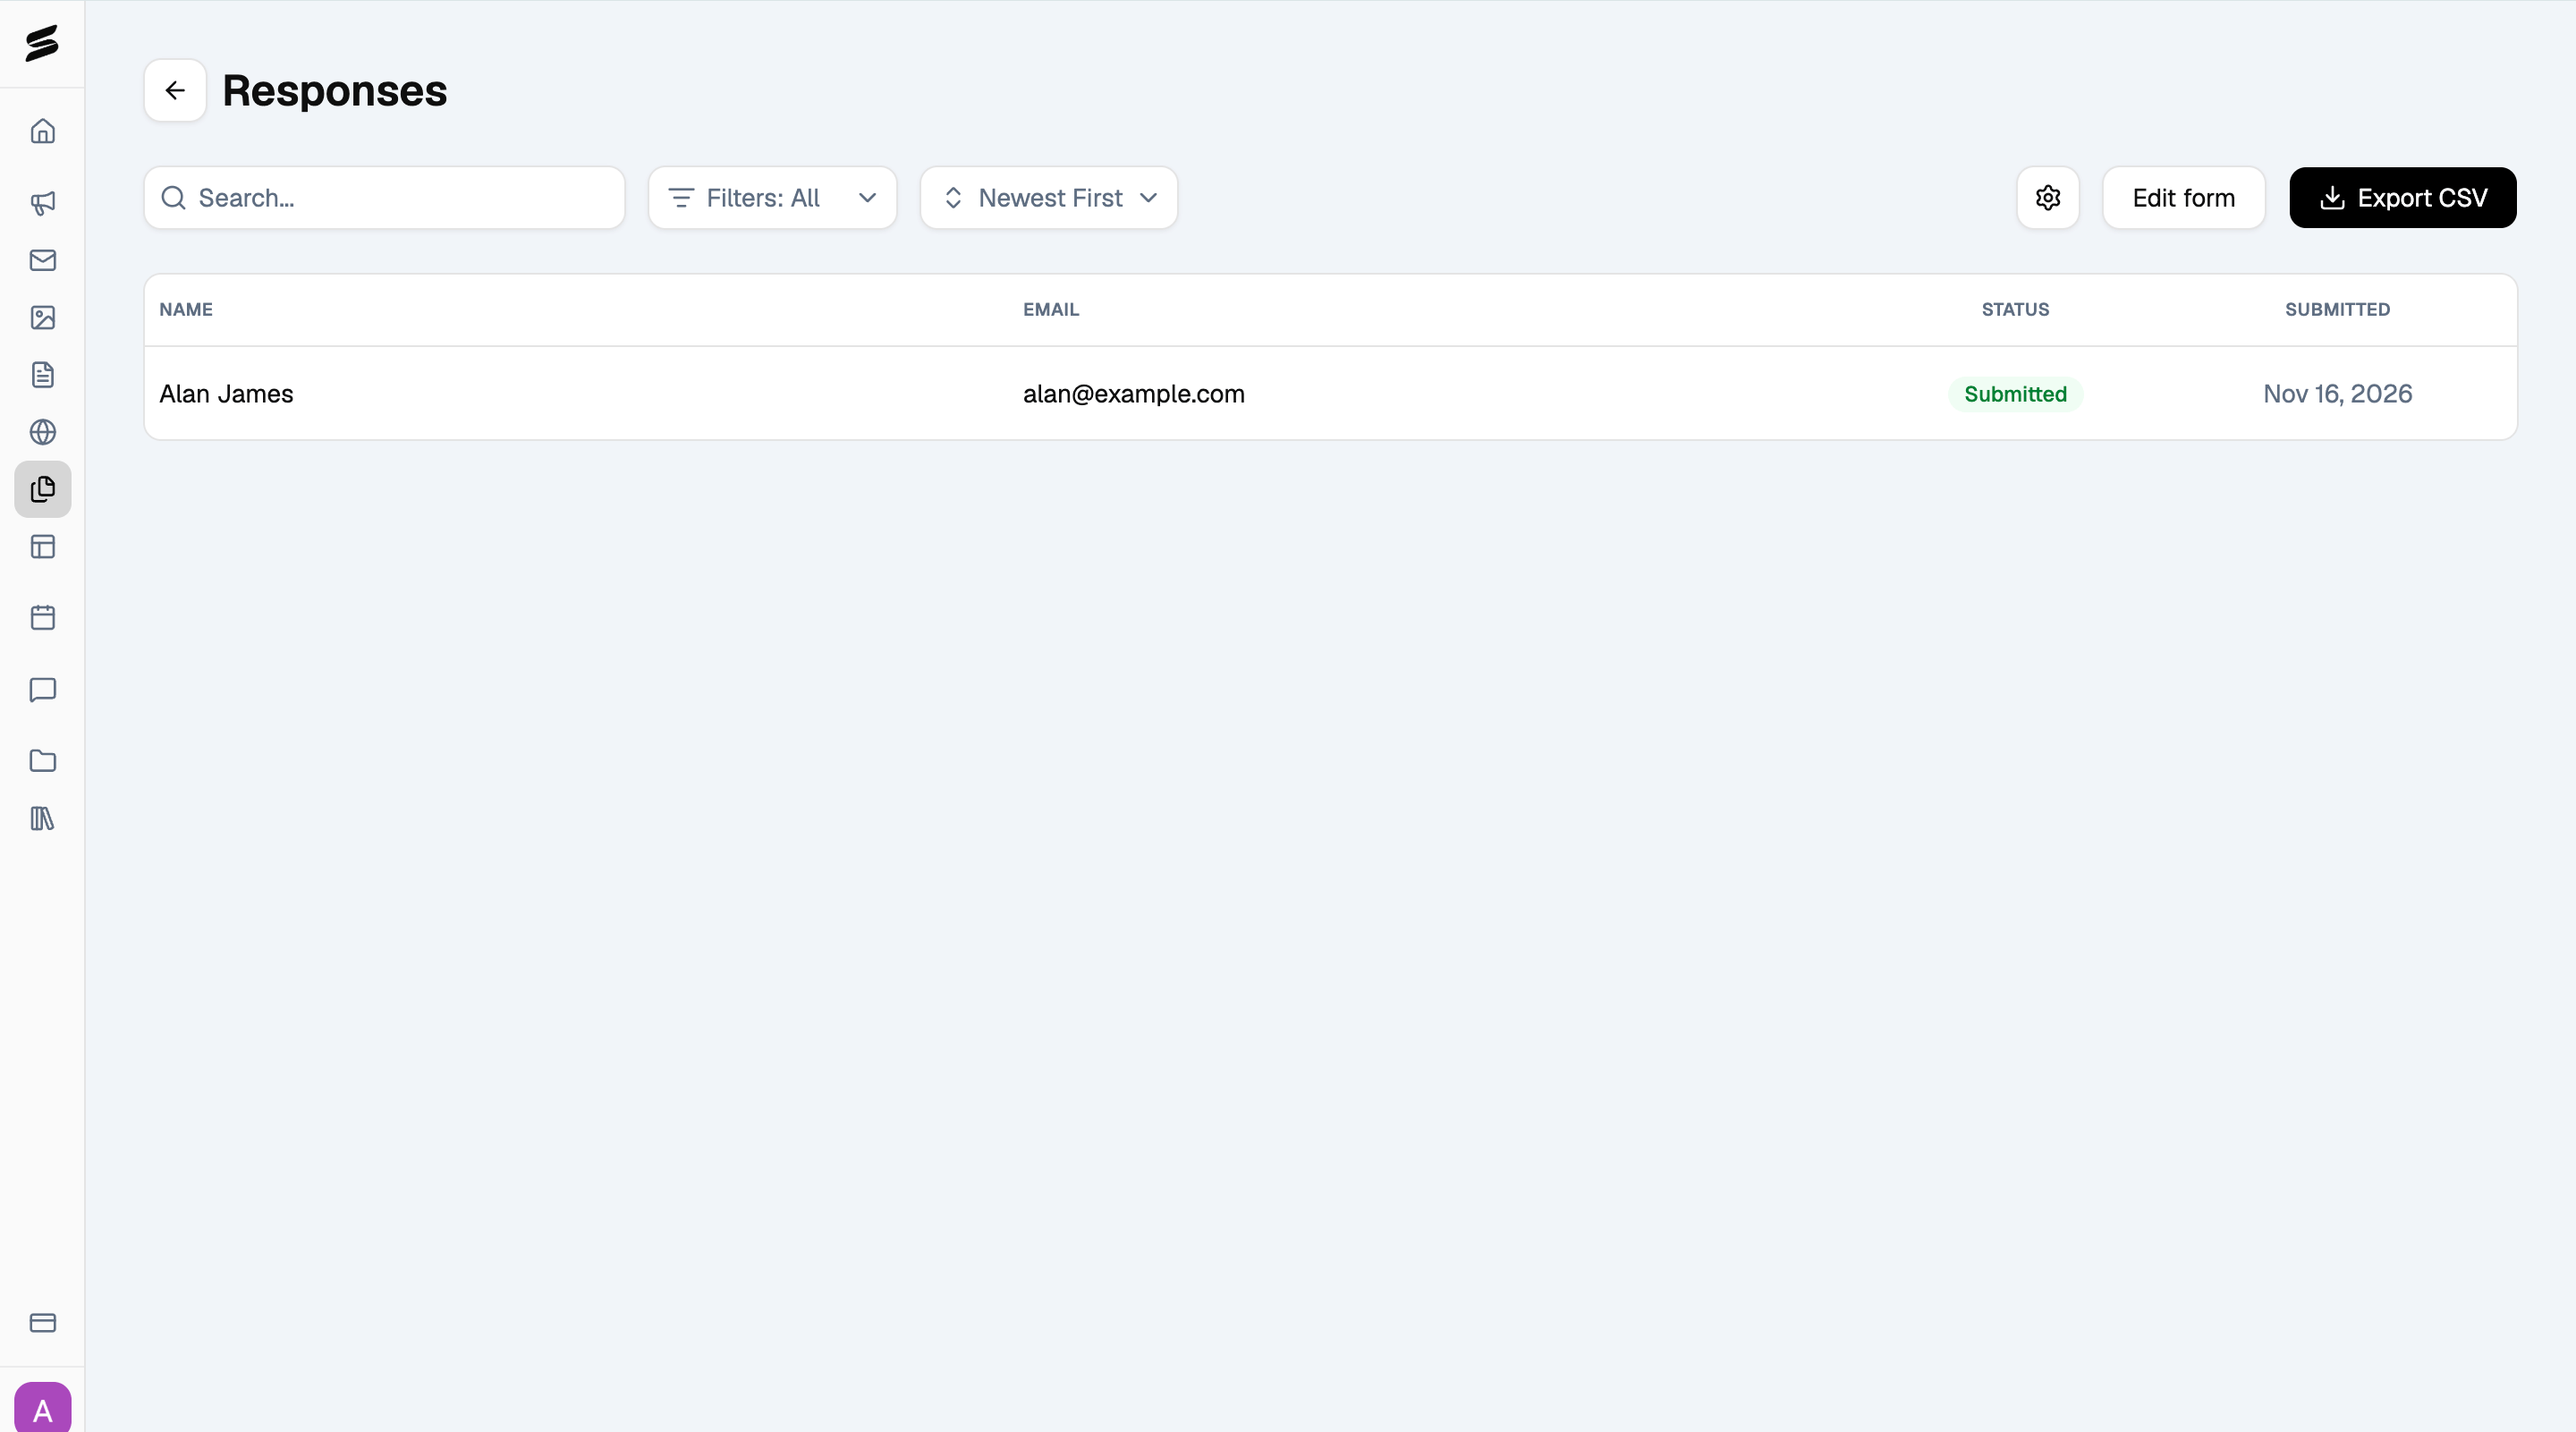
Review form responses
Once clients start submitting your form, you can view and manage their responses. Open the form to access its responses. From there, you can:- Search: find a specific response.
- Filter: narrow down the responses displayed.
- Sort: arrange responses by newest first.
- Edit form: return to the form builder to make changes.
- Export CSV: download the complete response list.
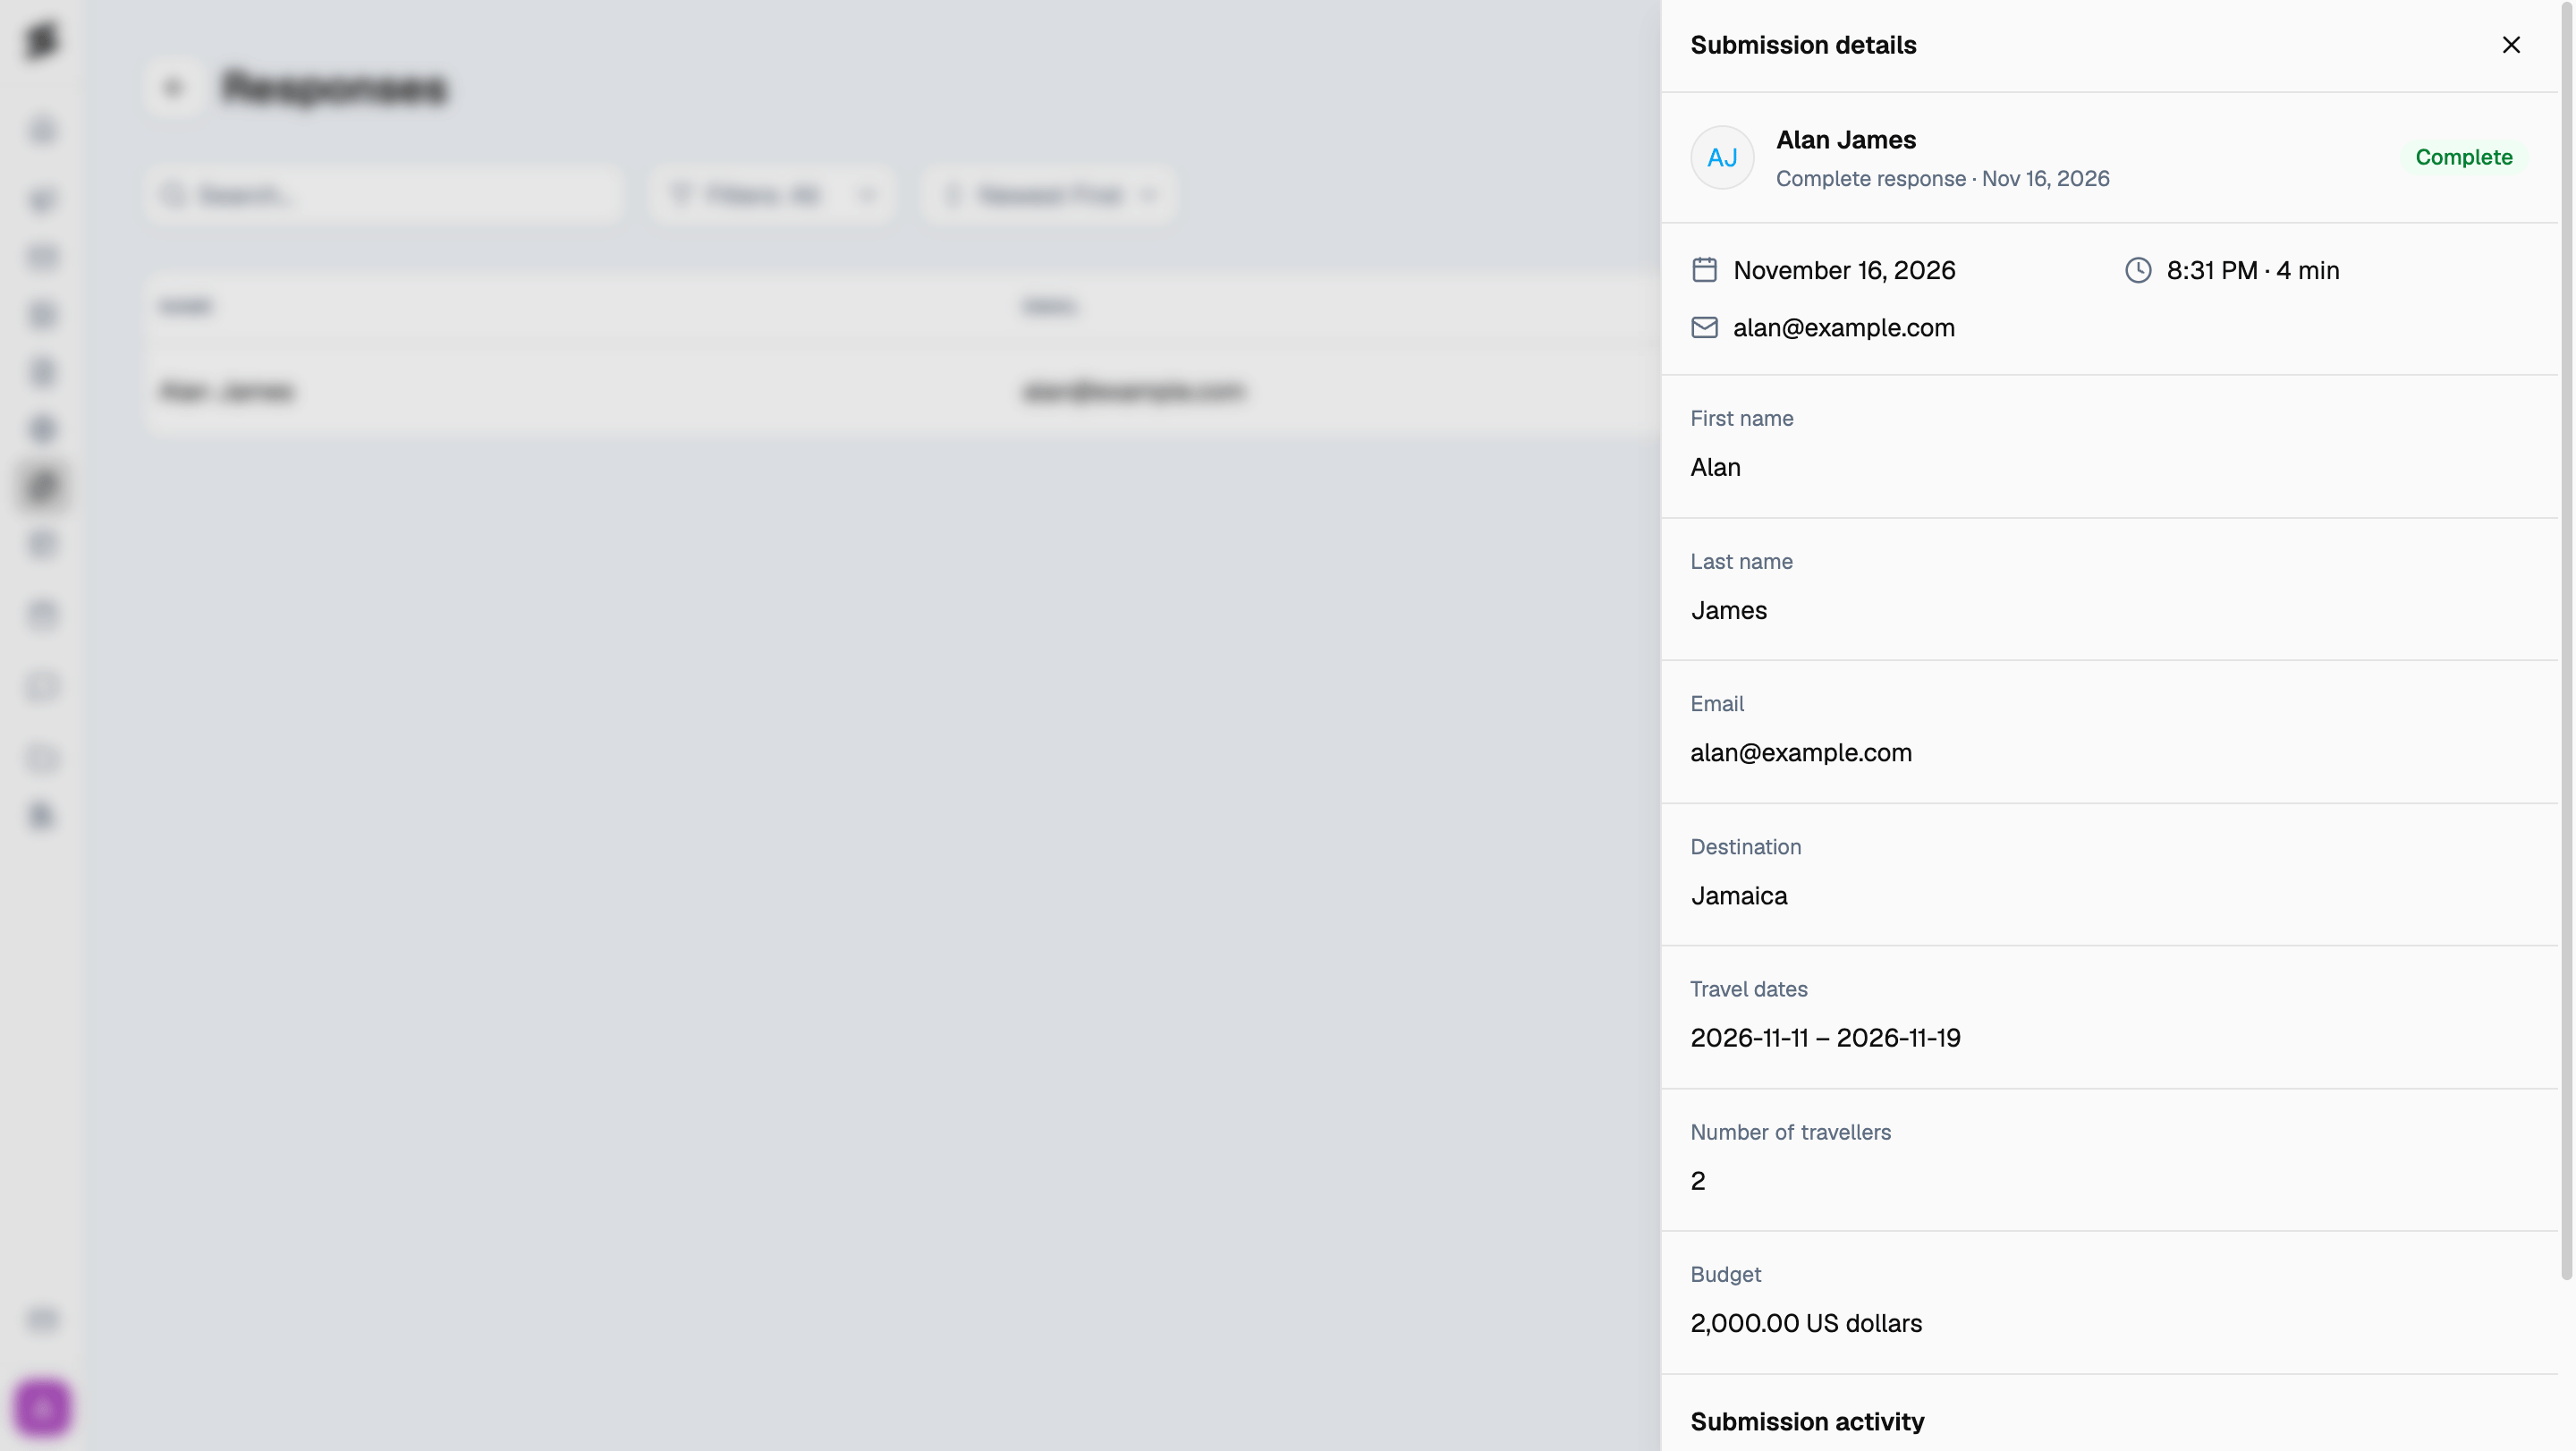
View submission details
Click any response to open its Submission details. You’ll be able to see every answer provided by the client, the date and time of submission, and how long the client took to complete the form.